Summary: Having trouble finding what you need with Spotlight on macOS Tahoe? Continue reading this blog to learn how to resolve the issue.
Have you encountered any of the following issues on macOS Tahoe?
- Spotlight doesn't display apps.
- Spotlight search isn't functioning.
- You're not getting the expected results from Spotlight.
- The Finder search isn't working.
The good news is that all these problems can be resolved by resetting the Spotlight Index. In this blog post, we'll guide you through three easy methods to reindex Spotlight on your Mac.

How to Rebuild Spotlight Index on macOS Tahoe
Method 1. Force Mac to Reindex Spotlight
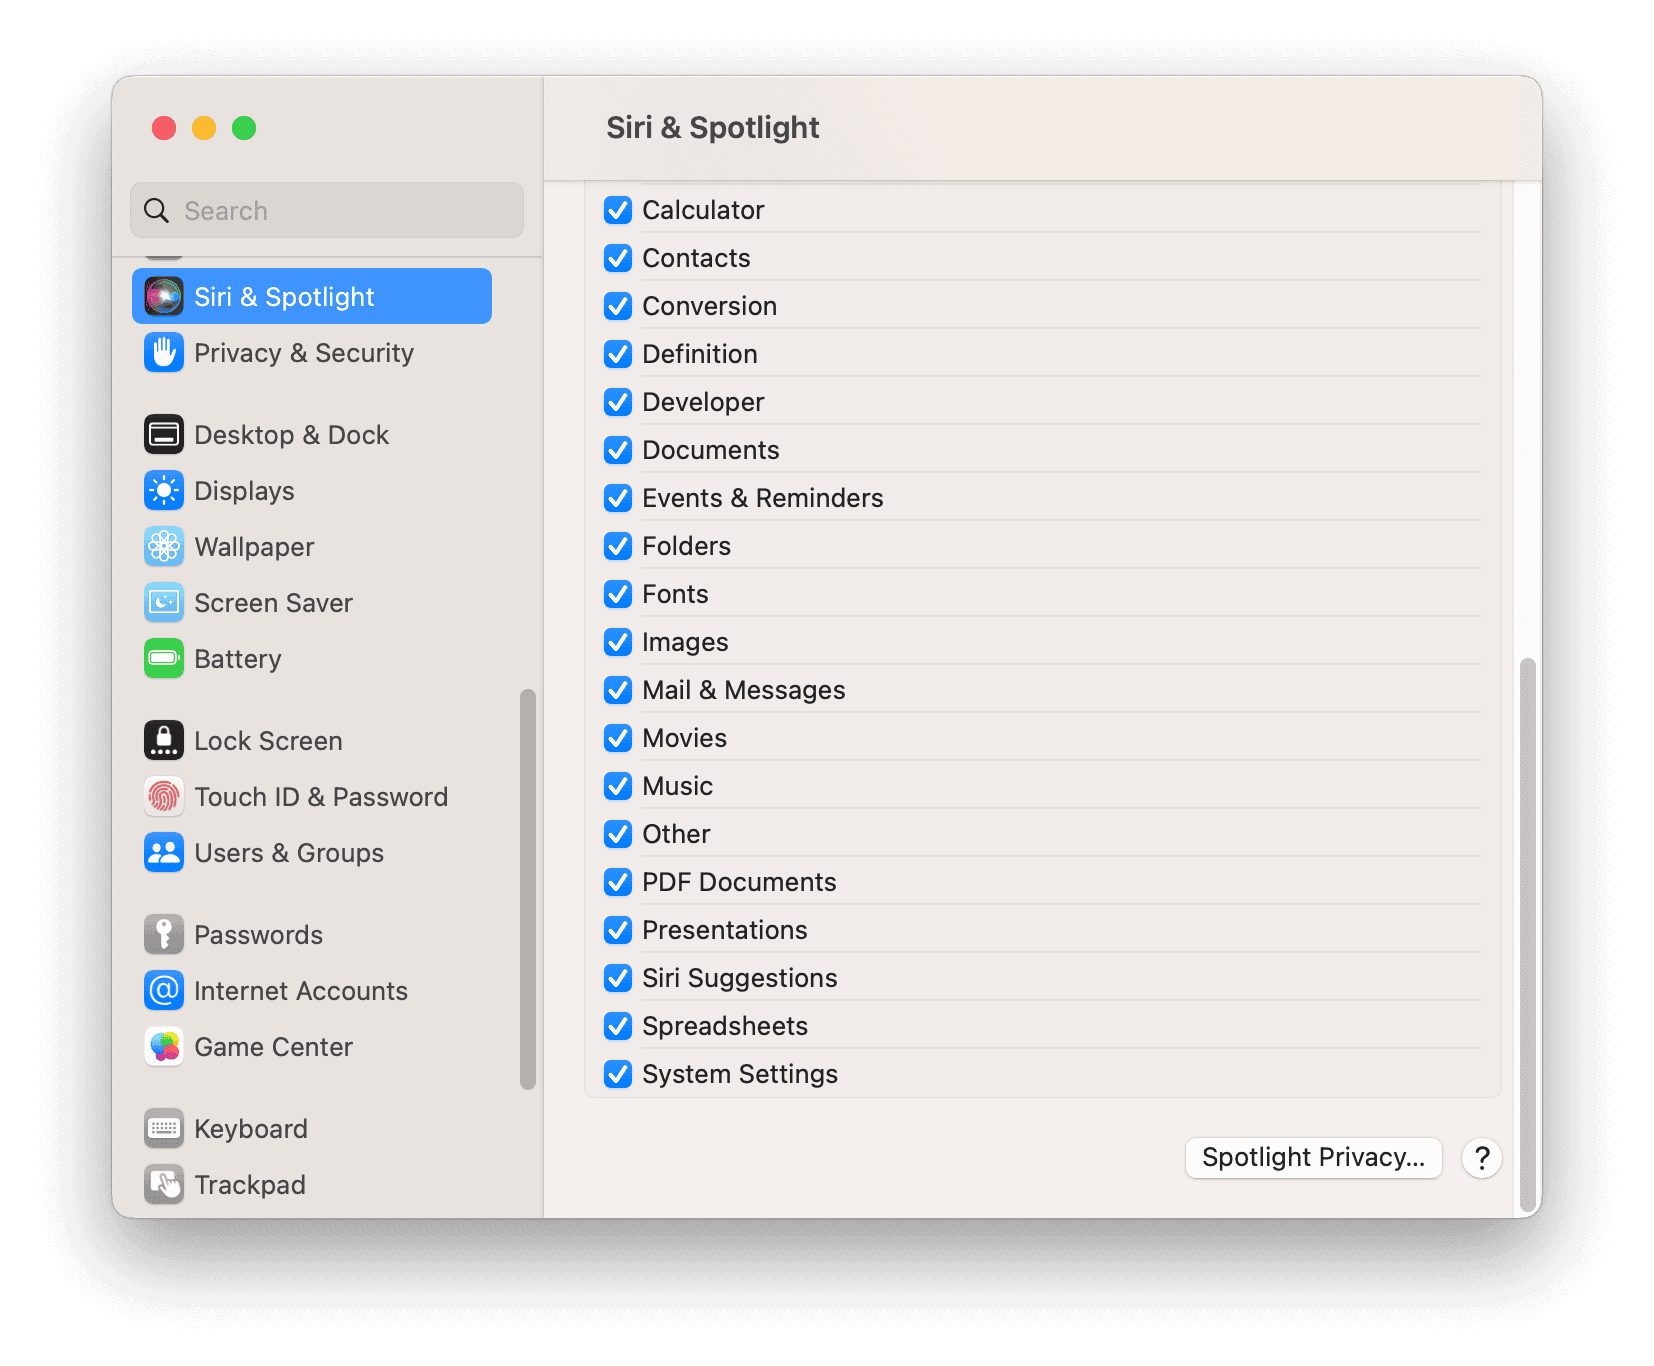
- Click the Apple Menu > System Settings > Siri & Spotlight.
- Scroll down to locate Spotlight Privacy and click on it
- Select the folder or disk to reindex and add it to the list of locations that Spotlight is prevented from searching. Alternatively, you can drag a folder or disk to the list.
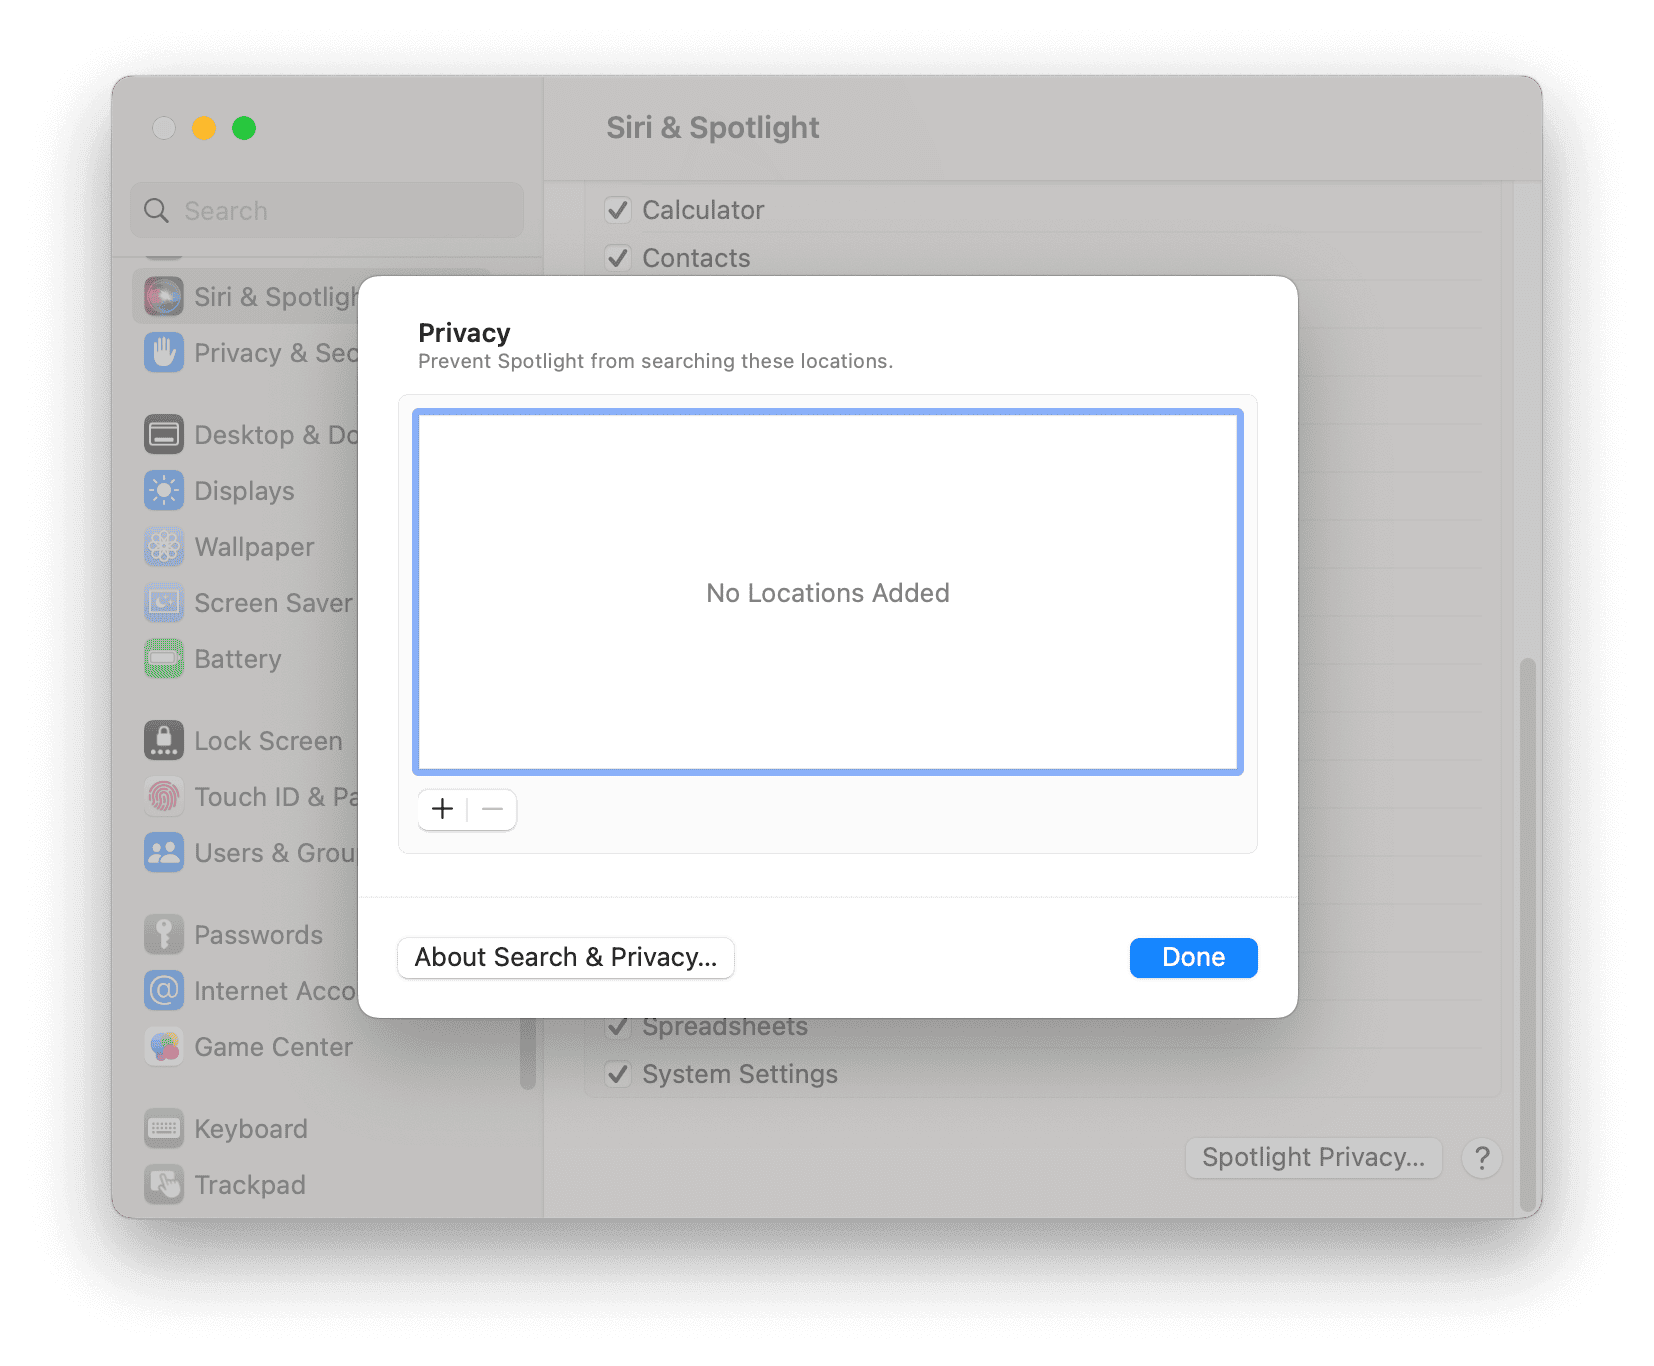
- Highlight the folder or disk you just added and click the Minus button to remove it from the list.
- Quit System Settings, and Spotlight will start reindexing the contents of the folder or disk.
The amount of time it takes to rebuild the index depends on the size of the folder or disk.
- Click the Spotlight icon in the menu bar, enter a keyword to search, and you will find a progress bar indicating Spotlight is indexing.
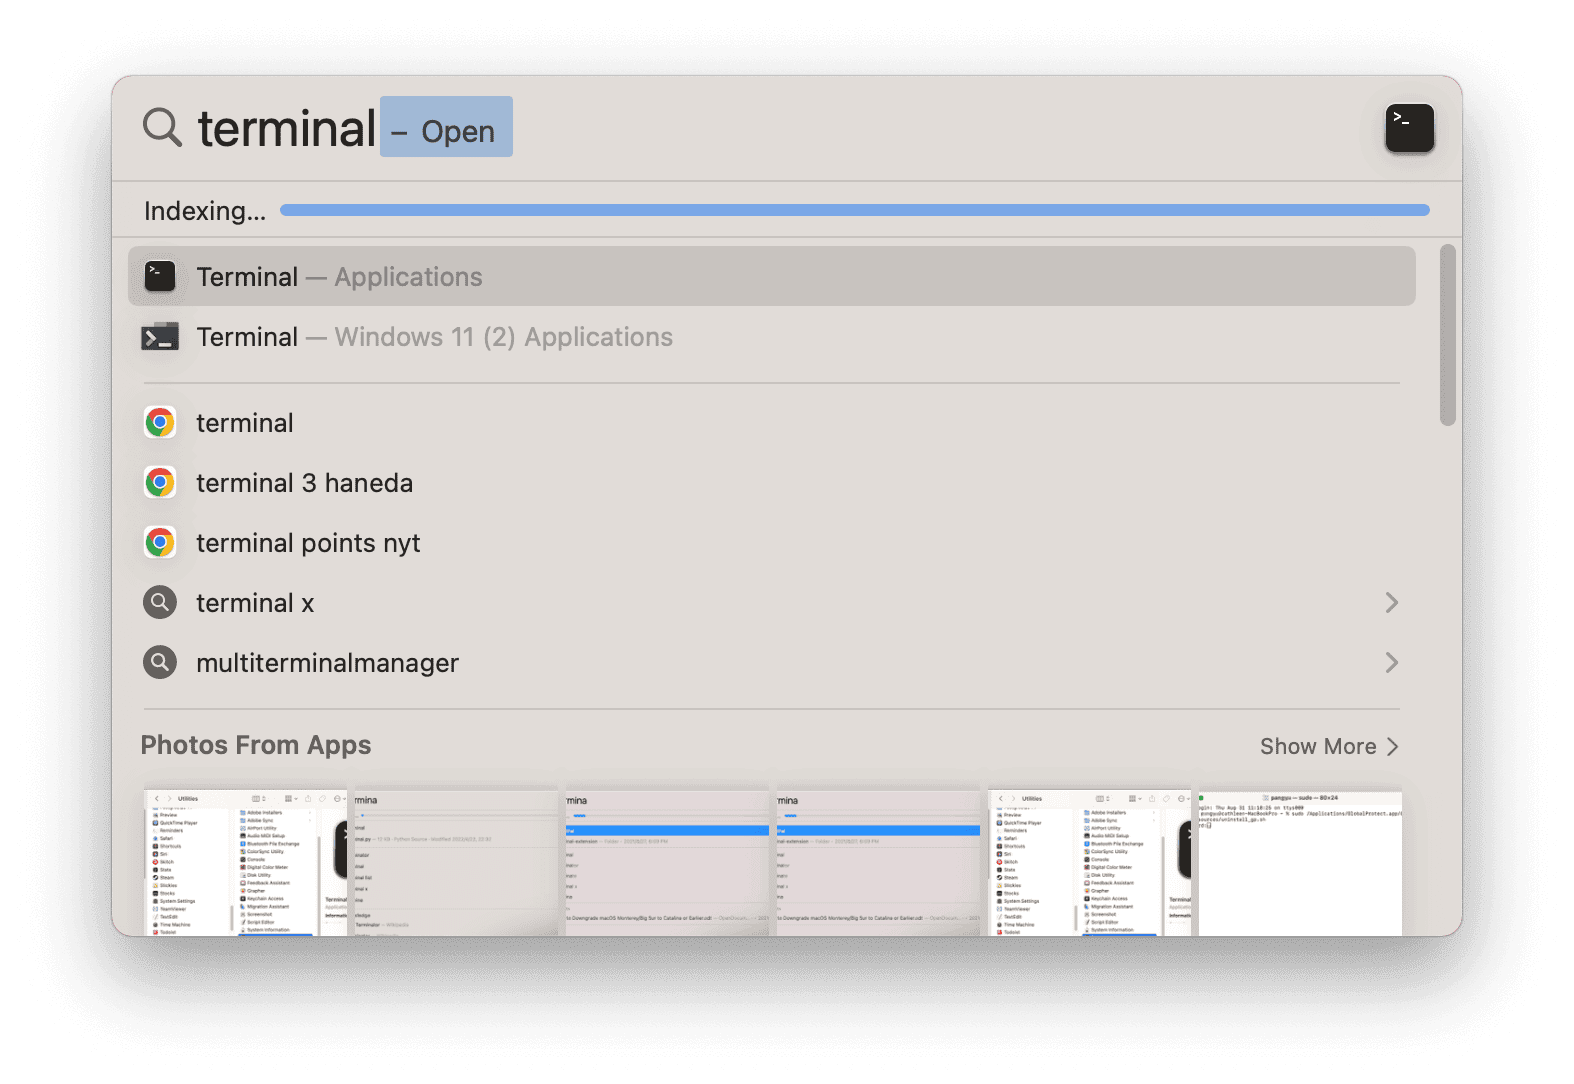
Method 2. Reindex Spotlight with Terminal
Terminal can also help you rebuild the Spotlight index. All you need is a few commands.
-
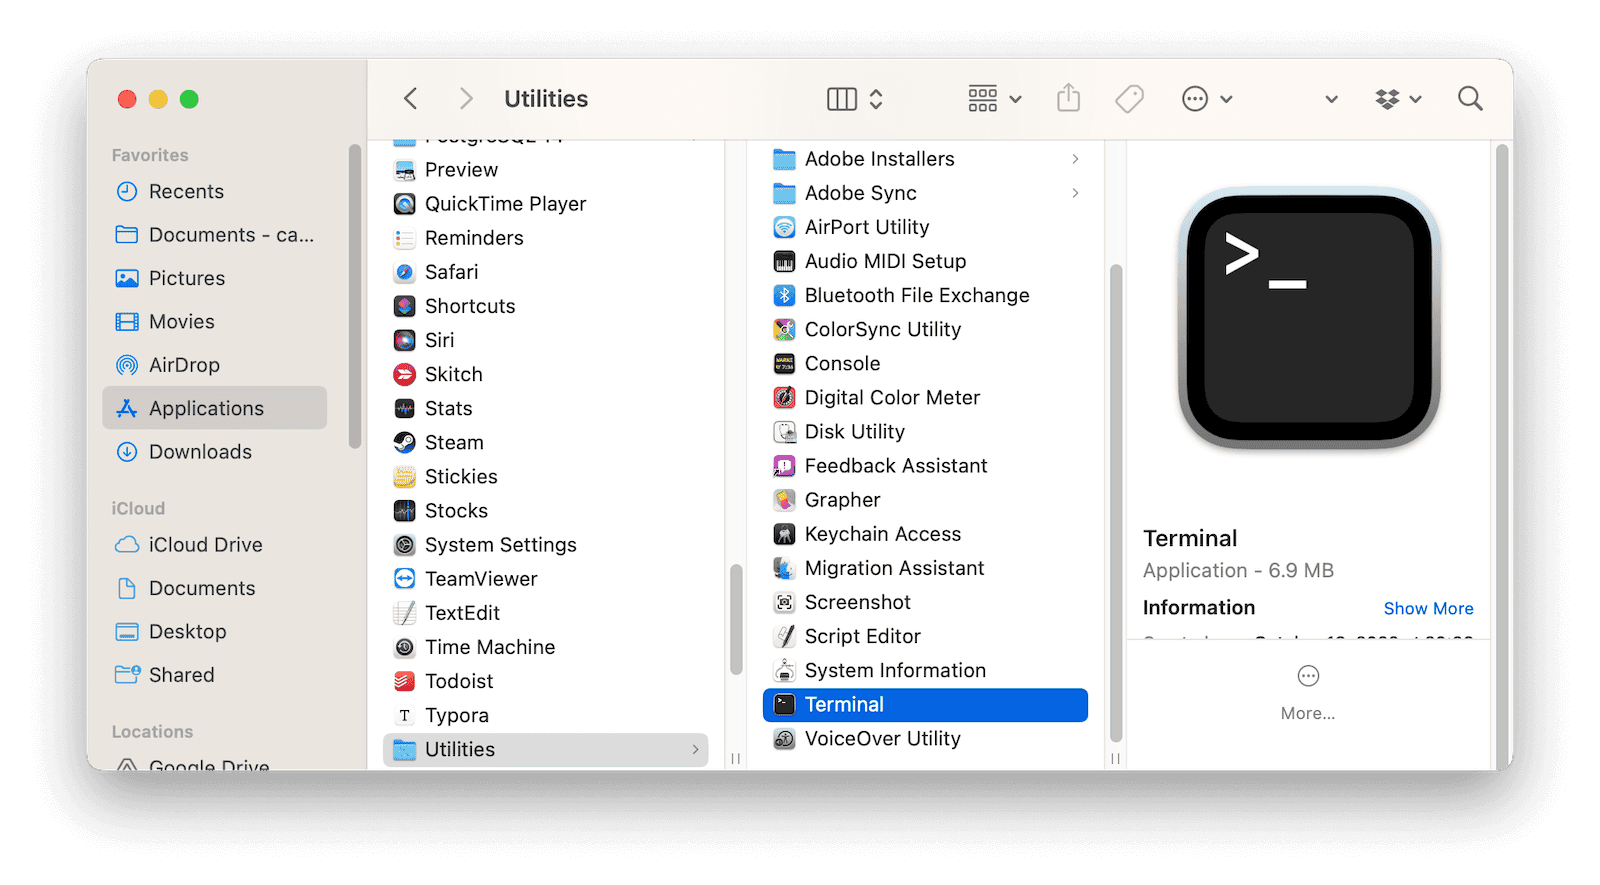
Open Finder, then click Applications > Utilities > Terminal.
-
In the Terminal, type and run the command:
sudo -i. -
Enter your administrator password and press Return.
-
Continue to run the commands
mdutil -Eaandmdutil -ai off. -
Enter the command
mdutil -ai onand press Return, and you will see a message saying that indexing is enabled.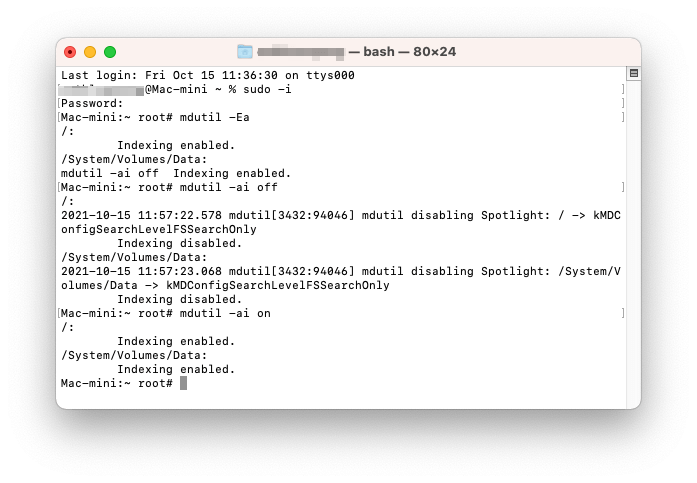
-
When you search using Spotlight, it will show that it is indexing.
If your Spotlight still isn't functioning correctly after following these steps, it may be due to a corrupted Spotlight directory. In this case, please run the command mdutil -X after step 4 and then proceed with step 5 to ensure that the index rebuild starts from scratch.
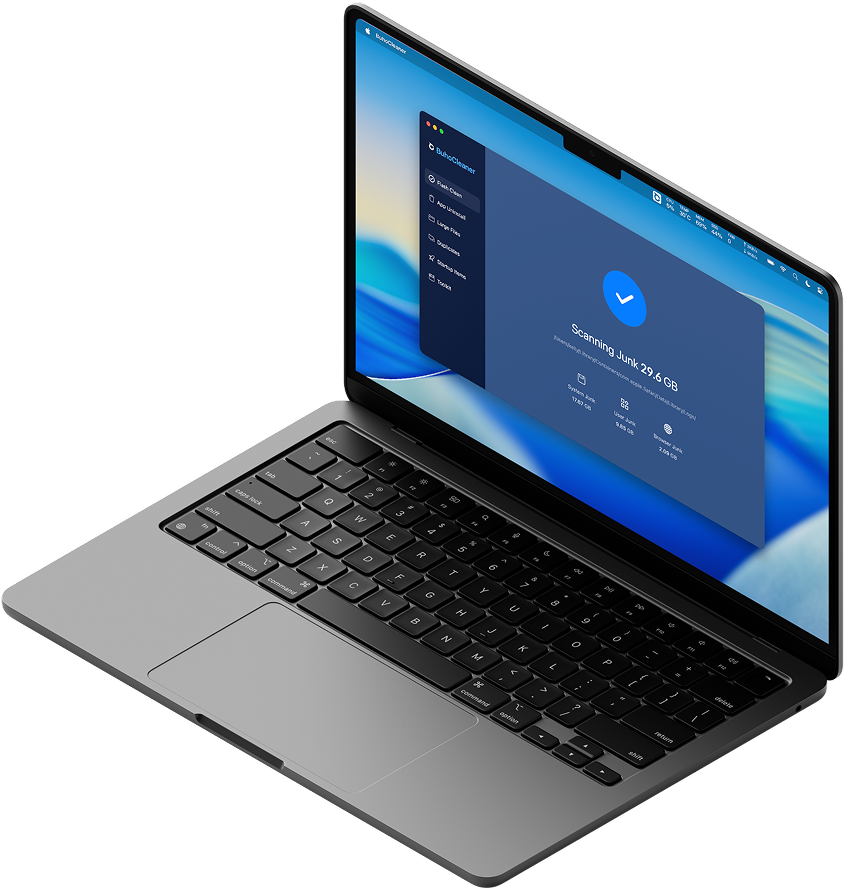
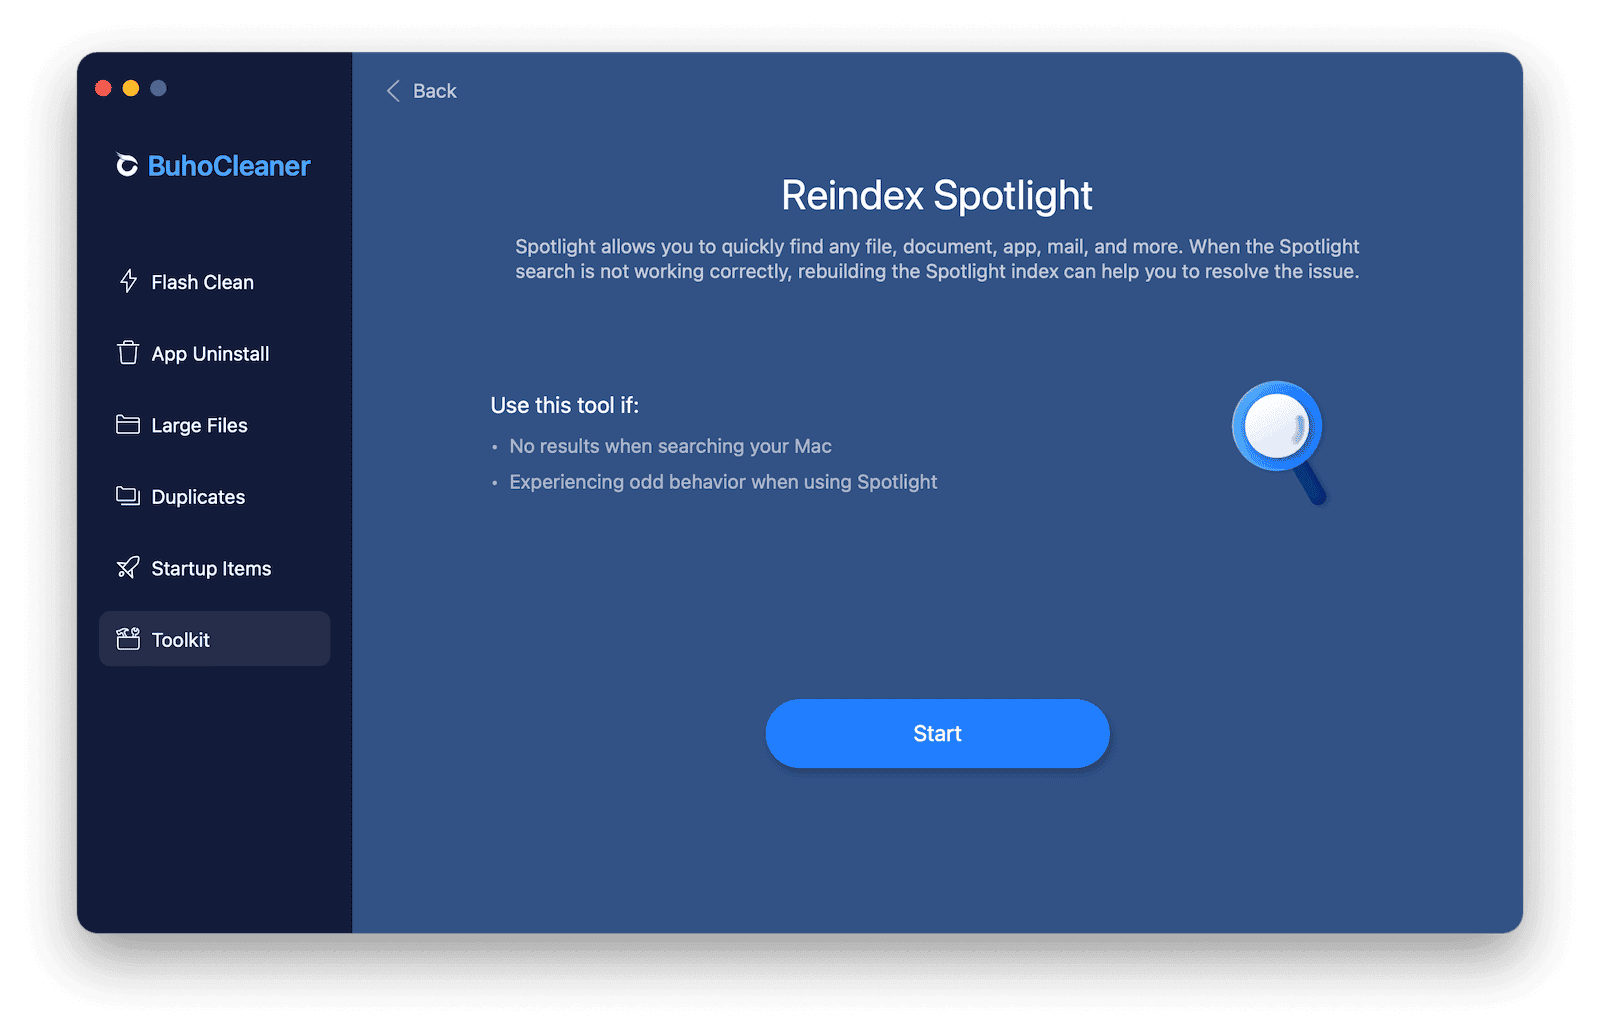
Method 3. Reindex Spotlight with BuhoCleaner
If you find the above two methods difficult, consider using BuhoCleaner, a convenient tool that allows you to rebuild the Spotlight index with a single click.
- Download and install BuhoCleaner on your Mac.
- Launch it and click the Toolkit in the sidebar.
- Select Reindex Spotlight, then click the Start button.
Bonus: What Does Spotlight Do on Mac?
Spotlight can help you quickly locate apps, documents, and files, find Siri's suggestions, handle calculations and conversions, and more.
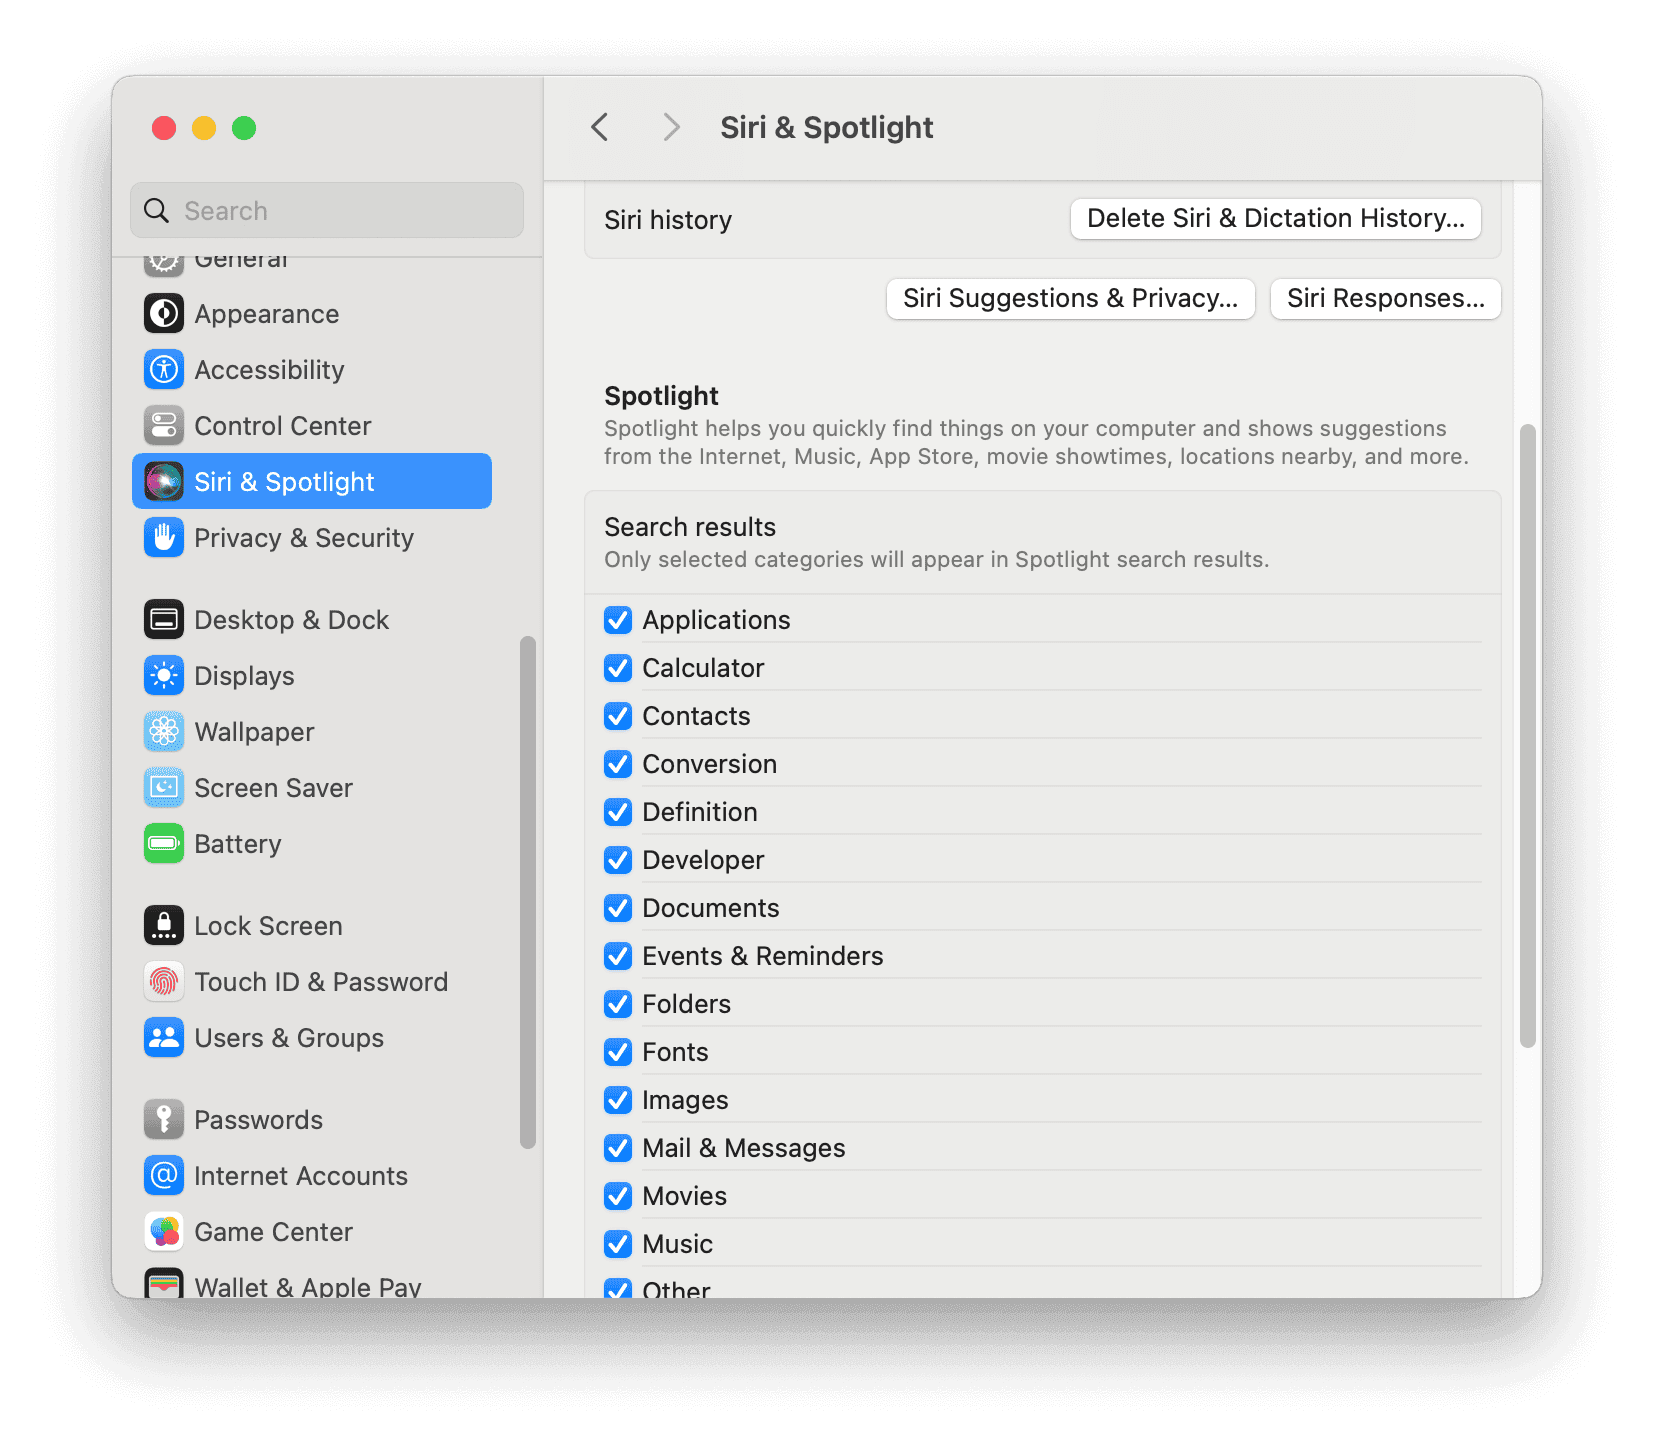
To check which categories will appear in Spotlight search results, follow these steps:
- Go to the Apple menu > System Preferences > Siri & Spotlight > Search Results.
- Folders not selected in this list won't appear in Spotlight search results.
Conclusion
We hope your Spotlight search is now working correctly. If not, consider restarting or updating your Mac.
By the way, BuhoCleaner offers many more features for you to explore. Feel free to give it a try!