How to Open and Use Disk Utility on Mac to Manage Disks

Disk Utility is macOS’s built-in disk management tool. Below, you’ll learn how to open it and make the most of its features on your Mac.
How to Open Disk Utility on Mac – 4 Ways
Way 1: Open Disk Utility Using Spotlight
- Click the Spotlight icon in the top-right corner or press Command + Spacebar to open Spotlight Search.
- Type Disk Utility or diskutil and press Enter to launch the app.


Way 2: Launch Disk Utility from the Dock
If Disk Utility is already in your Dock, simply click its icon to open it.
To keep it in the Dock for easy access: open Disk Utility, right-click its Dock icon, and choose Options > Keep in Dock.
Way 3: Open Disk Utility from Finder
- Click the Finder icon in the Dock or press Command + N to open a Finder window.
- Navigate to Applications > Utilities and double-click Disk Utility.


Way 4: Launch Disk Utility from Terminal
- Open Spotlight and type Terminal, then select the Terminal app.
- In Terminal, type
diskutiland press Enter to access Disk Utility.
How to Use Disk Utility on Mac
Disk Utility offers many features for managing your disks and volumes. Here’s how to use it for common tasks:
1. Repair a Corrupted Disk
If your Mac’s internal drive or an external disk shows issues, run First Aid to repair it:
- Open Disk Utility using any of the methods above.
- Select the disk or volume in the sidebar and click First Aid.
- Click Run to check and repair the disk.


2. Create or Delete a Volume
- To create a new volume, select the disk and click the + icon. Set the volume size and choose a file system like APFS, exFAT, or FAT, then click OK.
- To delete a volume, select it and click the - icon.

3. Format or Erase a Disk
Select a drive or partition and click Erase to wipe it. Choose a new file system to reformat the disk. Always back up important files before erasing.
Related Article: How to Format a USB Drive on Mac or Windows 10/11
4. Encrypt a Disk
To encrypt a disk, it must first be erased:
- Select the disk and click Erase.
- Name the partition, choose GUID Partition Map for Scheme, and select an encrypted format.
- Set a password for the volume (you can change it later via File > Change Password) and click Erase to encrypt it.
5. Restore a Disk
- Select a volume and click Restore.
- Choose the source volume to copy from.
- Click Restore to overwrite the destination volume. Make sure to back up any important data on the destination first, as this will erase it.
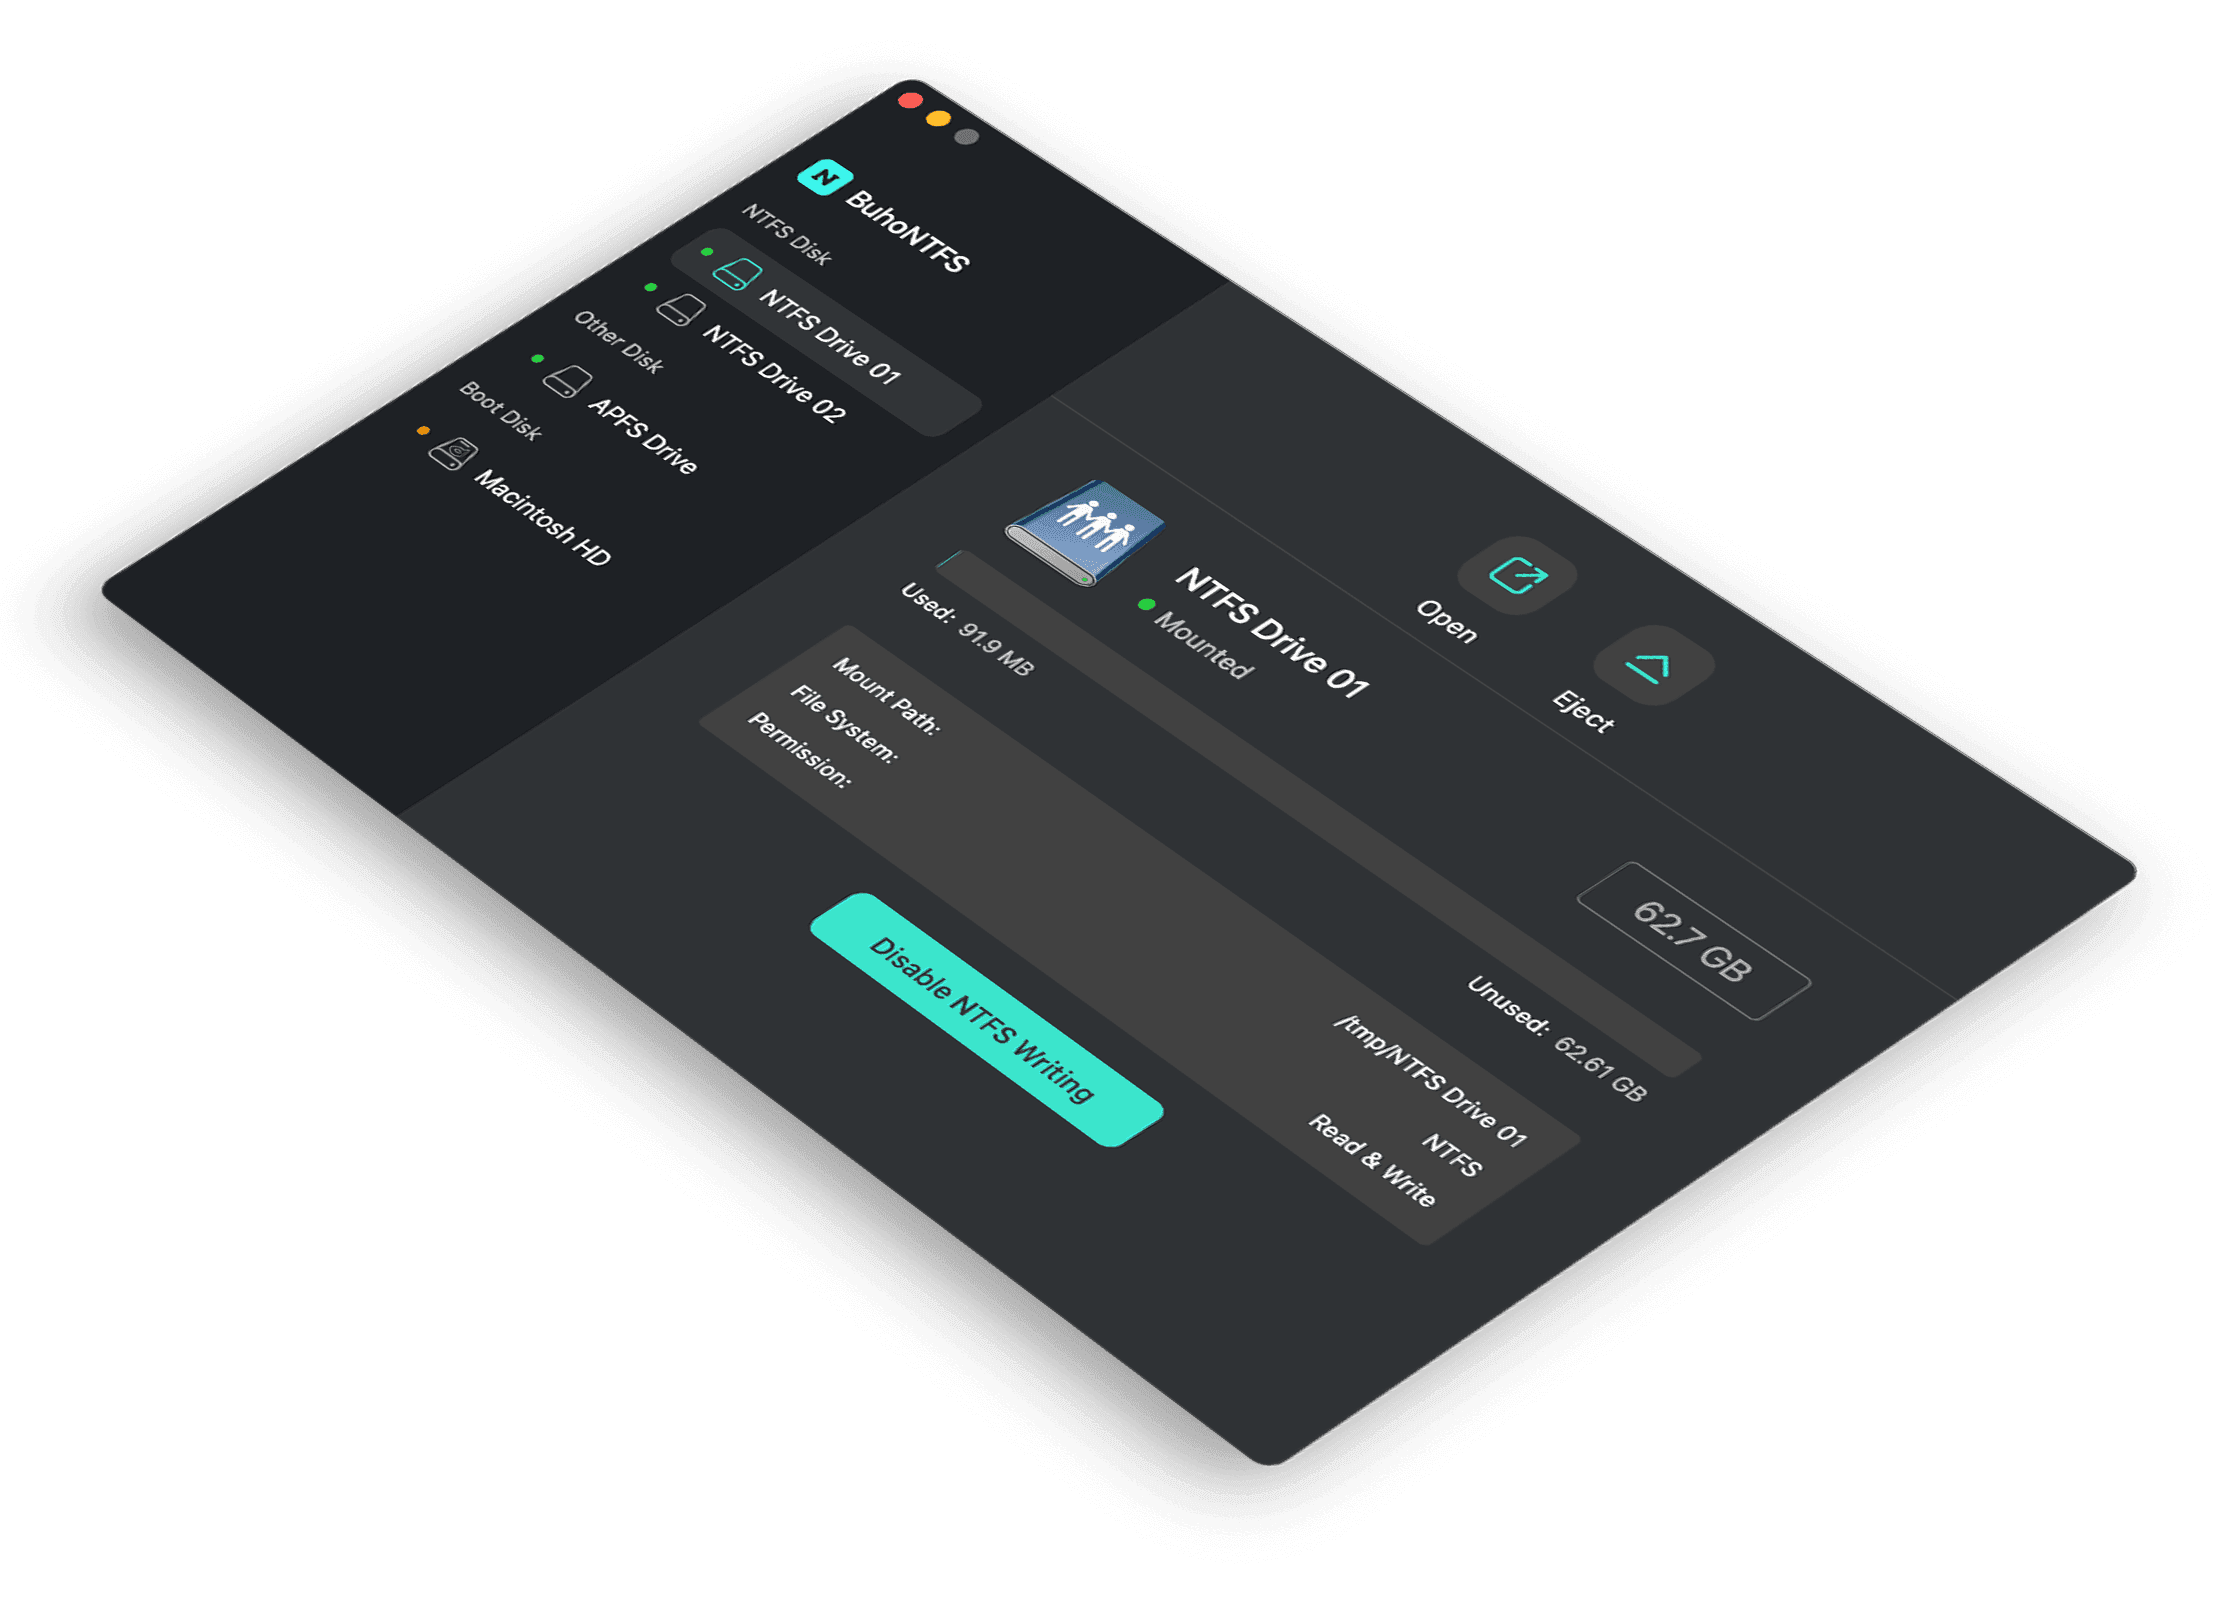
6. Mount or Unmount a Disk
Select a volume in the sidebar and click Mount or Unmount in the toolbar.
Related: How to Mount NTFS Drives Read-Write on Mac – 3 Ways
The End
This guide covers how to open Disk Utility on Mac in four different ways and shows how to use it to repair disks, create or delete volumes, format, erase, encrypt, restore, and mount/unmount drives.
For more Mac tips and tools, please visit Dr.Buho Inc.: https://www.drbuho.com/.
Cassie has been writing about technology for her entire career life - over 5 years. She enjoys diving into how Apple products work and then breaking it down in a way anyone can understand.