How to Mount NTFS Drive Read-Write on Mac (Tahoe) – 3 Ways

If you connect an external NTFS drive (USB, HDD, SSD, etc.) to your computer, macOS will automatically mount it in read-only mode. You may find that you can’t copy or write files to the NTFS drive from your Mac. Mac only supports reading NTFS drives. How to mount the NTFS drive in read-write mode on your Mac? Below are the possible 3 ways.
1. Mount NTFS Drive Read-Write on Mac with NTFS for Mac Software
The easiest way to mount an NTFS drive in read and write mode is to use an NTFS for Mac tool. You can find some free or paid NTFS for Mac software applications in the market. Here we introduce BuhoNTFS - a professional and easy-to-use Mac NTFS application - to you.
BuhoNTFS enables you to mount NTFS drives in read & write mode on your Mac and lets you smoothly read and write data on the NTFS drive from your Mac.
Step 1. Download and install free BuhoNTFS on your Mac from its official website.
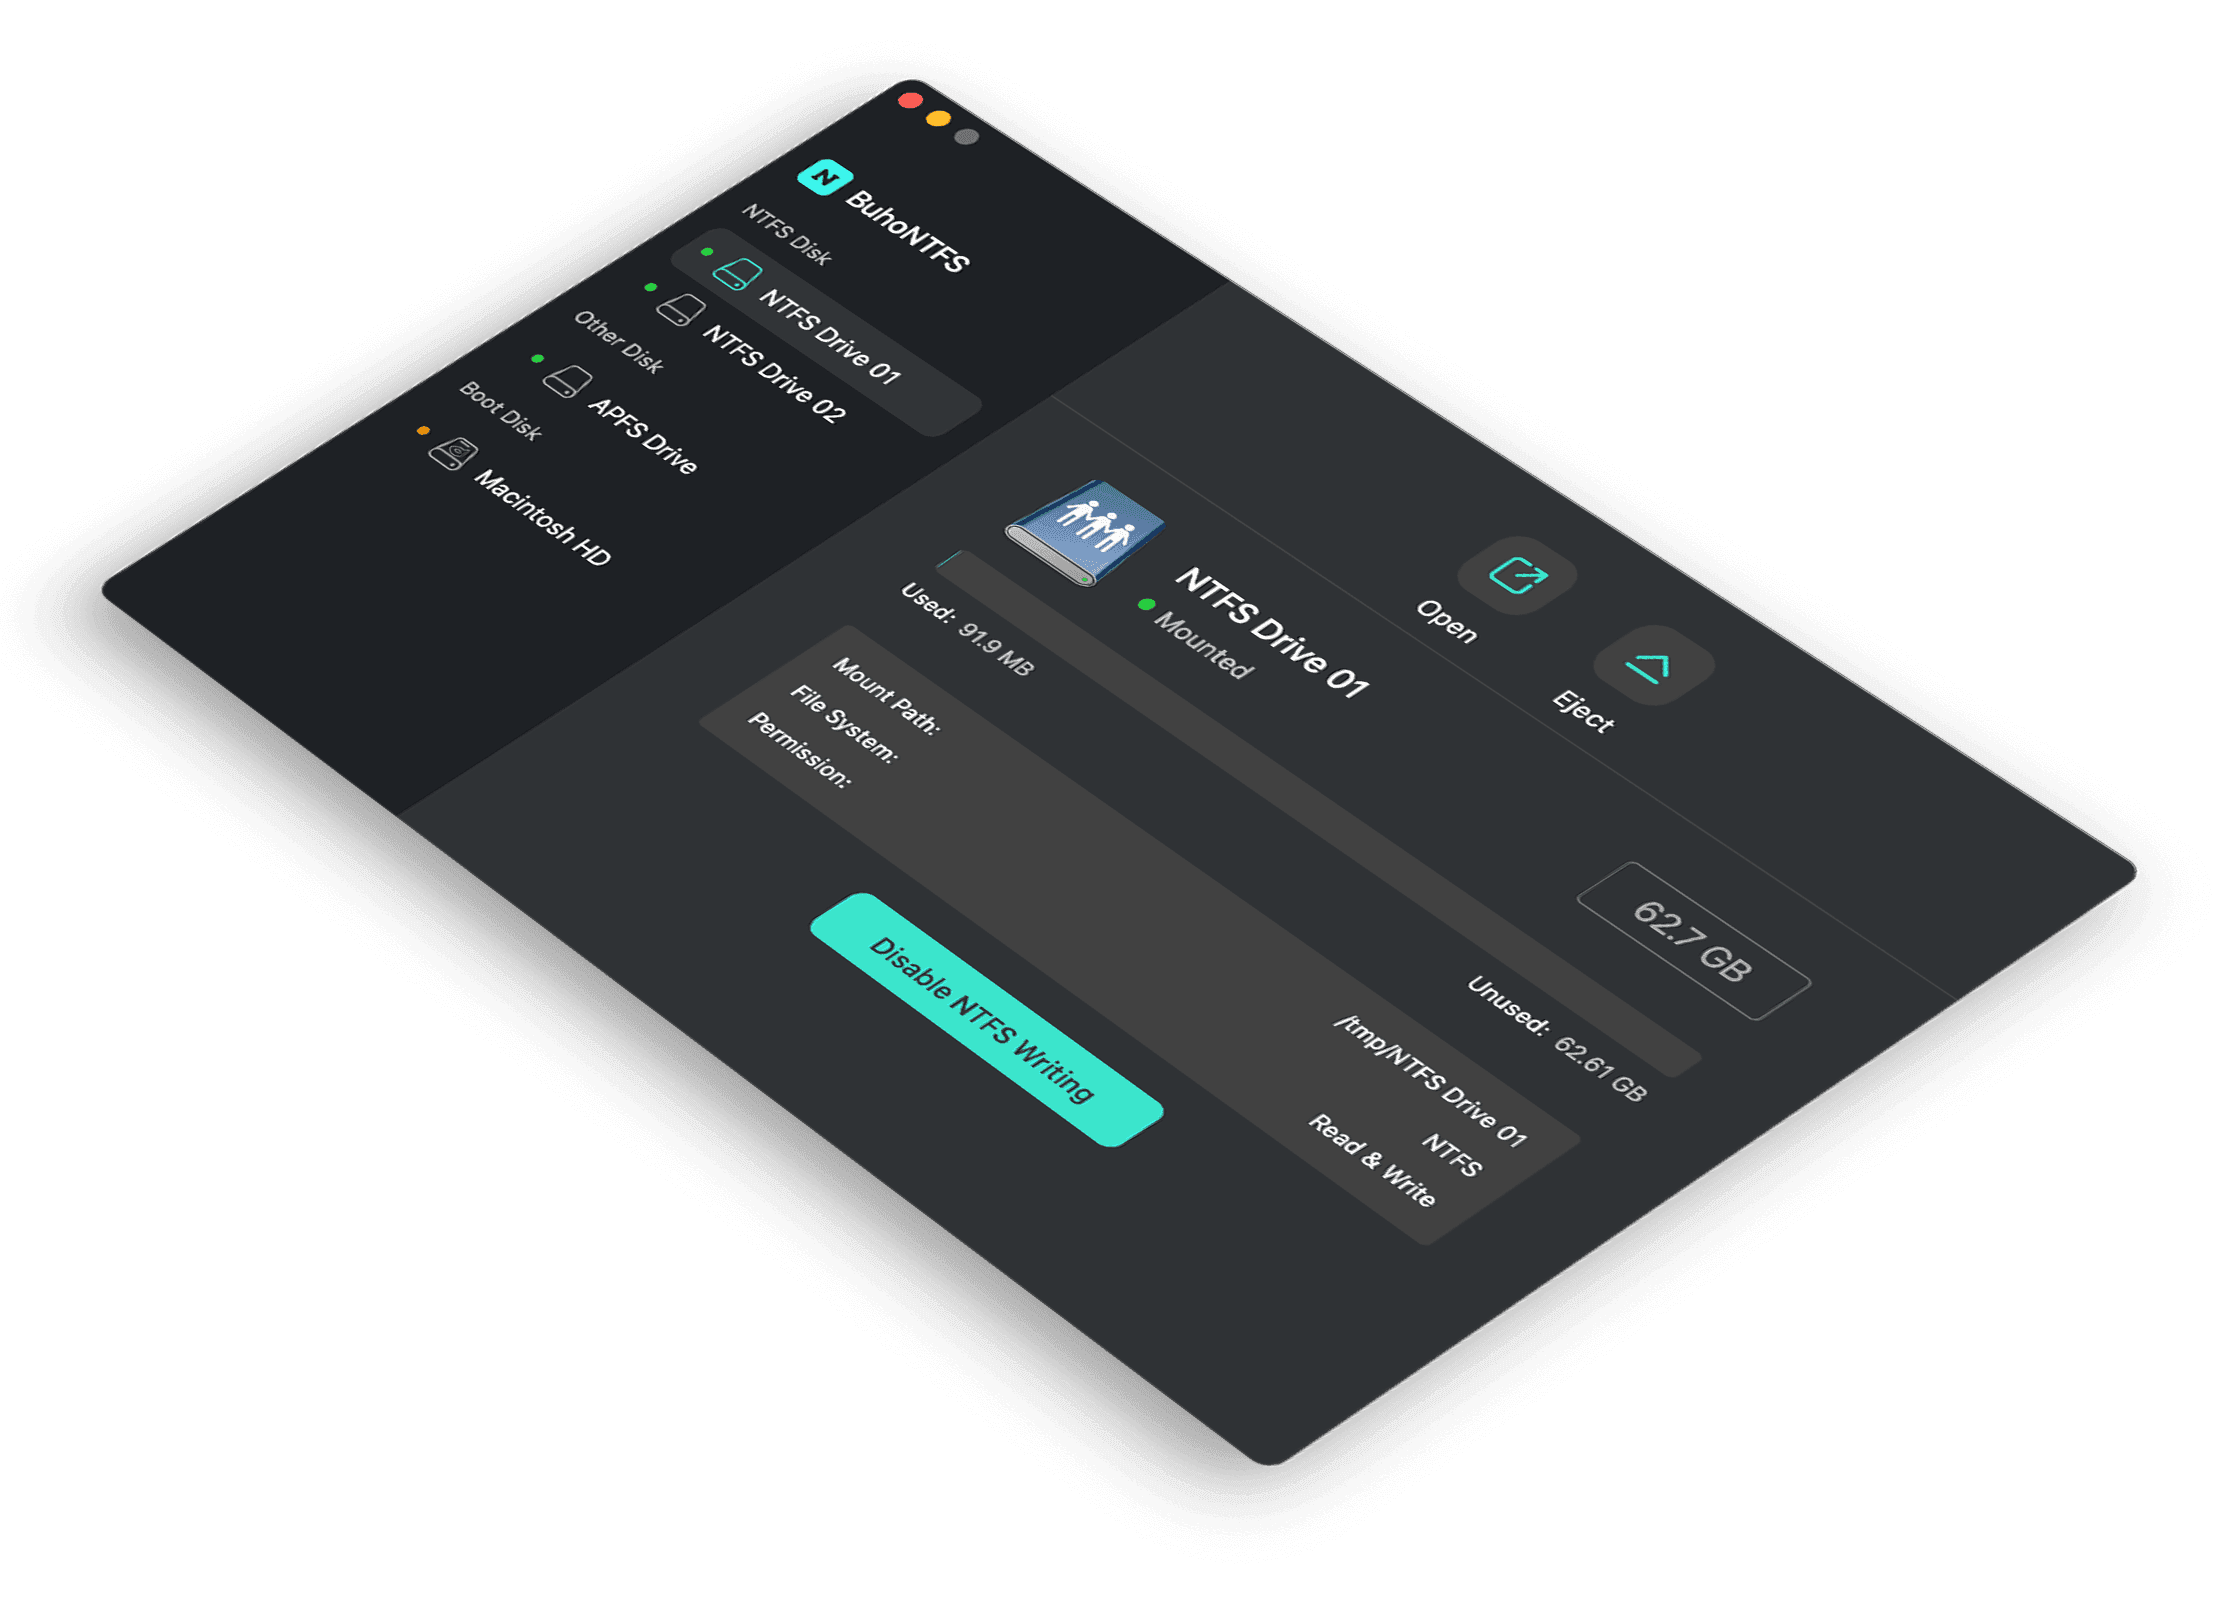
Step 2. After installation, open the app, and you should see a list of connected drives. Find and click the target NTFS drive that you want to mount in read-write.
Step 3. Tick the "Allow Read & Write permission" option to change the disk permission to Read-Write status. You should now be able to read and write files on the NTFS drive on your Mac.


2. Mount NTFS Drive Read-Write on Mac with Terminal
You can also use the Mac Terminal app to enable the NTFS write support on your Mac. Check the steps below.
Step 1. Open the Terminal app by searching for it with Spotlight.
Step 2. Type the command sudo nano /etc/fstab and press Return.
Step 3. Type the command LABEL=NAME none ntfs rw, auto, nobrowse, and press Return. Replace “Name” with the exact name of the target NTFS drive.
Step 4. Now the NTFS disk should be in read & write mode, you can find and open the NTFS drive from Finder to start using it.
However, this method is not recommended by Apple since it may cause disk corruption. If you insist on doing it, you should back up all important data on the NTFS drive to another safe place beforehand.
3. Format NTFS Drive to exFAT/APFS
Although the best way to mount external NTFS drives in read-write status is to use an NTFS for Mac app, if the NTFS disk is blank, you can reformat it to exFAT, FAT32, or APFS to make it writable.
Step 1. Search the Disk Utility app via Spotlight to open it.
Step 2. Find and choose the target NTFS drive from the left panel.
Step 3. Click the Erase button. Choose a preferred file system format compatible with your Mac, like exFAT, FAT32, or APFS. Follow the instructions to format the drive. If you need to use an NTFS drive on a Windows or Mac computer, it is recommended that you choose exFAT or FAT32 because both Mac and PC support it.


Bottom Line
This post provides 3 possible solutions to help you mount an NTFS drive in read-write mode on your Mac. Hope it helps.
If you need a Mac cleaner tool to manage and release Mac disk space and speed up your Mac, you can try BuhoCleaner.
Cassie has been writing about technology for her entire career life - over 5 years. She enjoys diving into how Apple products work and then breaking it down in a way anyone can understand.