How to Enable Your Mac to Write to NTFS Drives - 4 Ways

This post offers some possible ways to help you enable the NTFS write support on Mac so that you can smoothly read and write NTFS drives on your Mac computer.
Does Mac Support NTFS?
NTFS is a file system developed by Microsoft. It is the default file system of newer Windows operating systems like Windows 10 and Windows 11.
As for Mac NTFS compatibility, Mac operating systems can smoothly read Windows-formatted NTFS drives. However, Mac doesn’t let users copy, write, edit, or delete files on the NTFS drive. To enable Mac to write to NTFS drives, you may try the 4 ways below.
How to Enable NTFS Write Support on Mac - 4 Ways
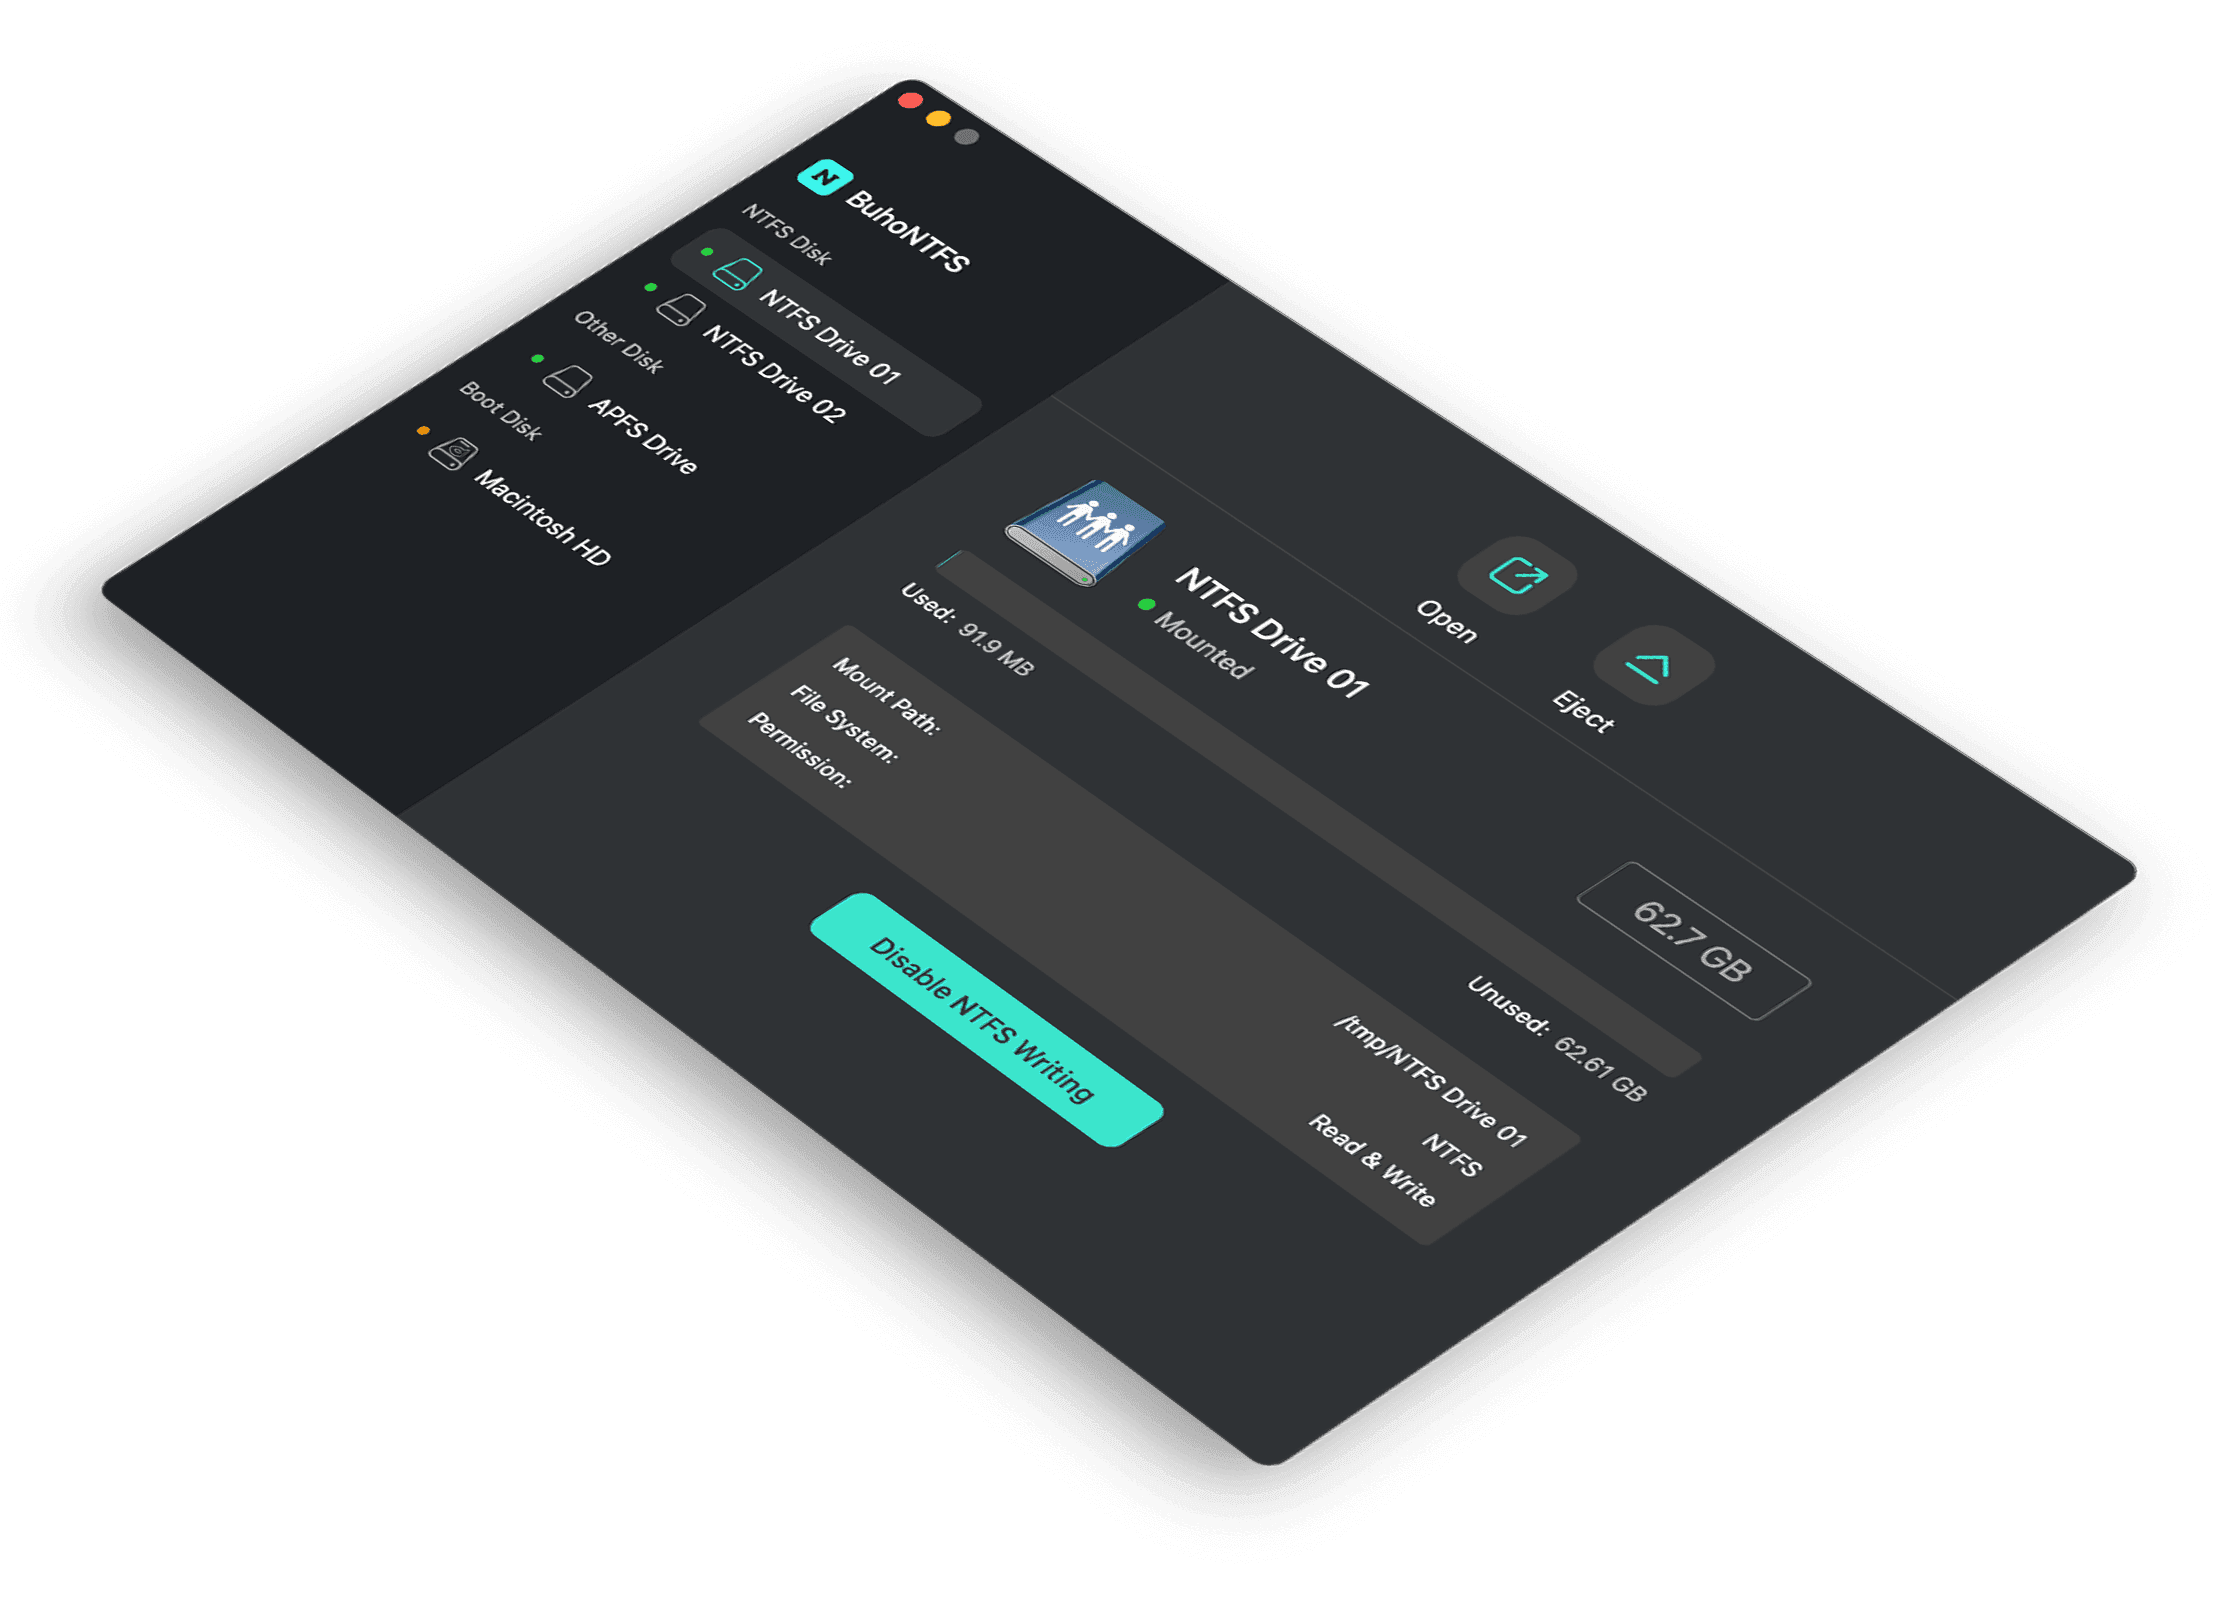
Way 1. Use NTFS for Mac Software
The easiest way to make the NTFS drive writable on Mac is to use a professional NTFS for Mac software program.
BuhoNTFS is the best choice to read and write to NTFS drives on your Mac. It helps you easily mount an NTFS drive with read & write permission on your Mac.
- Download and install BuhoNTFS on your Mac.
- Connect the NTFS drive to your Mac.
- Launch BuhoNTFS. Select the target NTFS disk.
- Toggle on the "Allow Read & Write permission" option.


Way 2. Enable Mac to Write to NTFS Drives with Terminal
The second way to enable Mac NTFS write support is to use Terminal commands.
- You can open the Terminal app via Spotlight.
- Type the command
sudo nano /etc/fstaband press Enter. - Then type the command
LABEL=NAME none ntfs rw, auto, nobrowseand press Enter. Replace “NAME” in the command with the exact name of the target NTFS drive.
Way 3. Convert NTFS to exFAT, etc.
You may also try some disk partition managers online to see if they can help you convert the NTFS drive to exFAT or APFS.
Way 4. Reformat the NTFS Drive to exFAT, etc.
If the hard drive is new and doesn’t have any data on it yet, you may reformat it to exFAT or APFS which is perfectly compatible with Mac systems. You can open Disk Utility and use the Erase feature to easily format the drive to exFAT or APFS.


Mac NTFS Support FAQs
Why can’t I write NTFS on Mac?
Mac only allows you to read NTFS drives but not to write to them. If you want to enable the NTFS write support on Mac, you may try one of the 4 ways above.
How to make NTFS writable on Mac?
The commonest way to make an NTFS drive writable on Mac is to utilize a professional Mac NTFS application. This way helps you install an NTFS driver on your Mac and lets you flawlessly write/copy/edit files on the NTFS drive. Still, it will not cause any data loss on the drive and you don’t need to format the drive.
Why is NTFS for Mac read-only?
macOS isn’t compatible with the way NTFS writes data to drives, so Mac limits the write support for NTFS drives. By default, it only lets you read the files from the NTFS drive.
Bottom Line
This post gives a simple explanation for Mac NTFS support/compatibility. In conclusion, Mac only supports reading NTFS drives but not writing to them. To enable the NTFS write support on Mac, you may try the 4 ways introduced in this post.
Cassie has been writing about technology for her entire career life - over 5 years. She enjoys diving into how Apple products work and then breaking it down in a way anyone can understand.