Are you trying to install macOS Monterey but your Mac says "Not enough space to install macOS Monterey"? Don't worry; we are here to help you.
Have you ever encountered the "Not enough space to install macOS Monterey" error while installing macOS Monterey?
If so, refer to this guide to learn how to free up space on your Mac or MacBook for Monterey.

How Much Space Does macOS Monterey Need?
The macOS Monterey installer is about 12 GB in size. But you'll still need some extra space to install it. According to Apple, if you're upgrading from macOS Sierra or higher, macOS Monterey requires 26 GB of available storage to upgrade. And if you're upgrading from an earlier version, macOS Monterey requires up to 44 GB of available storage.
How to Check the Available Storage Space on Mac
Now that you know the total amount of space needed to install macOS Monterey, the next thing you need to do is to check how much free disk space you have. Here are the steps:

- Click the Apple Menu > About This Mac > Storage.
- After the calculation process is complete, hover your mouse over each part of the storage bar to see which types of files occupy the most storage space and how much space is still available.
If you have more than 44 GB of free space, then congratulations. Go ahead and upgrade to macOS Monterey right now. But what if you don't have enough space? How can you free up space for the installation of macOS Monterey? Read on for some solutions.
How to Free Up Space on Mac for macOS Monterey
1. Optimize Storage with Built-in Tools
Macs with macOS Sierra or later have built-in optimization tools that let you quickly optimize storage space.

- Click the Manage button above the storage bar to open the Storage Management window.
- You will see four optimization recommendations.
- Follow the recommendations to free up some space.
- Store in iCloud – Click the Store in iCloud button to store your photos, documents, files, videos, and more in iCloud.
- Optimize Storage – Turn it on, and macOS will automatically delete iTunes movies and TV shows that you have already watched.
- Empty Trash Automatically – If you enable this function, the system will automatically remove files that have been in the Trash for over 30 days.
- Reduce Clutter – Click the Review Files button and manually move unnecessary, bulky, or duplicate files and documents to Trash.
In addition to the four optimization suggestions, you may also notice a category labeled "Other". It takes up a lot of your storage space, but you can't open it. Wondering what it is and how to get rid of it? Take a look at this article: How to Delete "Other" Storage on Mac.
2. Clear Junk Files in One Click
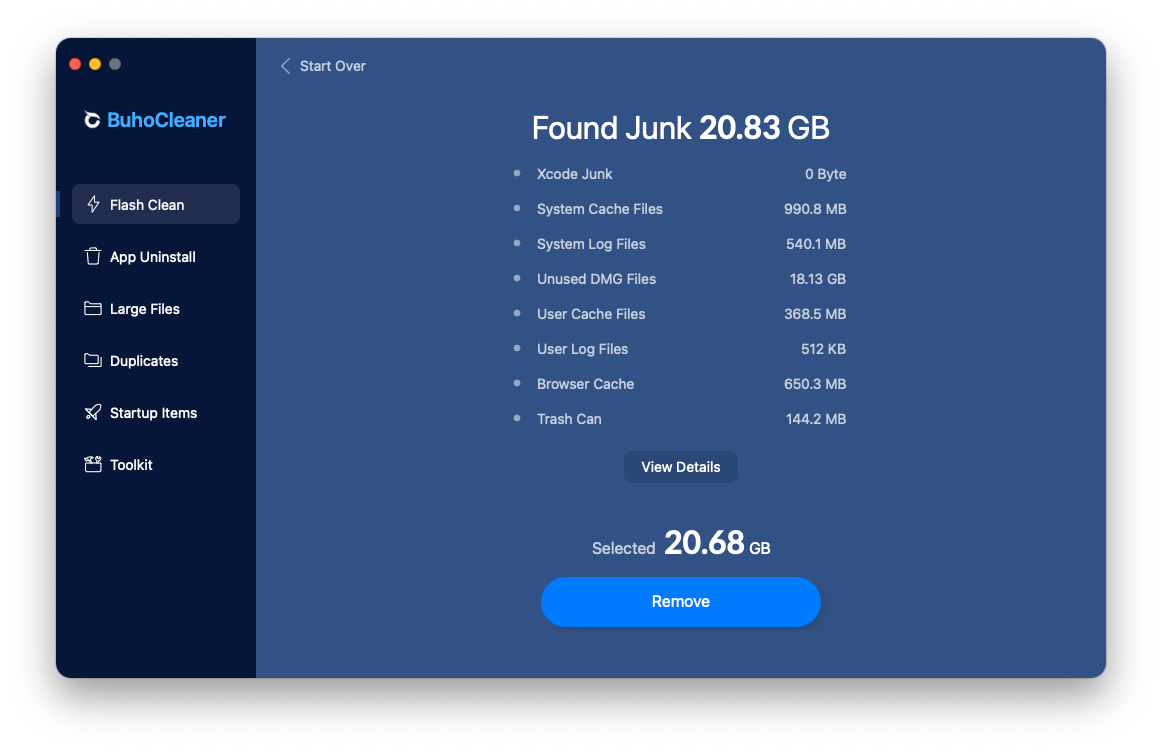
If you still haven't freed up enough space to install macOS Monterey, you can use a Mac cleaner like BuhoCleaner to clear your Mac with one click.
BuhoCleaner is one of the best Mac cleaning software, and it works perfectly on macOS Monterey. Designed to be powerful yet easy to use, this tool allows you to clean and optimize your Mac like a pro. With its Flash Clean feature, you can get rid of all the junk files from your system, browser, and users in a matter of seconds.
- Download and install BuhoCleaner on your Mac.
- Launch it and click the Scan button.
- Wait a few seconds, and you will see all the junk files on your Mac.
- Check the boxes next to the files you want to delete and click the Remove button. It's that easy!
3. Uninstall Apps You Don't Use
You probably have installed a great number of applications on your Mac. Some of them may no longer be of any use. Deleting them will help you reclaim some valuable storage space.
But how do you usually uninstall an app? Did you know the application is STILL on your hard drive! To completely delete it, you still need to remove its related files and empty them into the Trash. Here’s what you need to do:
- Click the Go menu in Finder and choose Library.
- Find the files associated with the application and move them to the Trash.

- Empty the Trash
A simpler approach is to use the BuhoCleaner (mentioned above) to uninstall any program you don't use. Try the app for free now.
4. Delete Large and Duplicate Files
Large files and duplicate files are eating up a ton of your storage space. Finding them and deleting them is a great way to free up some space. You can remove them manually, but it will take a considerable amount of time. Thanks to a third-party tool like BuhoCleaner, you can quickly get rid of these storage-consuming files.
- Download the trial version of BuhoCleaner.
- Install and launch it.
- To delete large files, select "Large Files" in the sidebar and click the "Scan" button.

- To delete duplicate files, switch to the Duplicates option, click the + button, and choose the folders you want to scan.

- Remove the results you don't need.
5. Delete Time Machine Backups
Your Mac will keep a copy of your Time Machine Snapshots in case your external drive can't be accessed. However, having them there will take up some of your valuable storage space. If you are sure that they are no longer needed, delete them from your Mac to reclaim space.
Here are the steps:
-
Open Terminal via Spotlight or Launchpad.
-
In the Terminal, type and run the command:
tmutil listlocalsnapshots. (You should be able to see a list of backups sorted by date.)
-
Type the command:
tmutil deletelocalsnapshots "xxxxxxx", enter the administrator password if asked, and hit the Return button on the keyboard. ("xxxxxxx" stands for the backup date of your Time Machine.) -
Repeat step 3 if you want to remove more than one Time Machine snapshot.
6. Remove Old iOS Backups
Those old iOS backups are no longer needed. Deleting them will help you reclaim some space.
Here's how to remove them from your Mac:
- Open Finder.
- Click your device in the sidebar.
- Under the General tab, click the "Manage Backups" button to view the backups stored on your Mac.
- Right-click on the backup that you don't want and select Delete or Archive.
- Click Delete Backup, and then confirm your operation.

Conclusion
Hopefully, by now, we have helped you resolve the problem of not having enough space for macOS Monterey. As you have seen, using a third-party tool can streamline the task and help you to achieve the desired result quickly and efficiently.
And BuhoCleaner is the handy Mac cleaner that can help you to do just that. You can free up gigabytes of space with just one click! Why not go ahead and give it a try?