How to Format USB/HDD to NTFS on Mac/PC: Step-by-Step Guide

How to Format USB/HDD to NTFS on Mac - 2 Ways
1. Use an NTFS for Mac Application
To format a USB or external hard drive to NTFS on Mac, you can use some professional NTFS for Mac software programs like iBoysoft NTFS for Mac, EaseUS NTFS for Mac, etc. These tools provide a Format or Erase option to allow you to easily format a drive to NTFS on your Mac.
2. Try Disk Utility
If you have installed an NTFS driver on your Mac by using some NTFS for Mac software applications, you may use the built-in Mac Disk Utility app to format USB or external hard drive to NTFS. These programs may add a "Windows NTFS" option in Disk Utility. Follow the steps below.
Step 1. Install an NTFS for Mac application like iBoysoft NTFS for Mac on your Mac.
Step 2. Connect the USB flash drive or external hard drive to your Mac. You may need to use a USB adapter for MacBook Pro/Air.
Step 3. Click Spotlight to search for Disk Utility to open Disk Utility on your Mac. You can also find and launch the Disk Utility app from Applications > Utilities.
Step 4. In the left sidebar of Disk Utility, you can see all connected drives. Select the USB flash drive or external hard drive that you want to format to NTFS. Make sure to select the right drive.
Step 5. Click the Erase button on the Disk Utility toolbar. In the new window, click the drop-down icon next to Format and select Windows NTFS format. Choose GUID Partition Map scheme.
Step 6. After the configuration, click the Erase button to start formatting the USB or external hard drive to NTFS on Mac.


Does NTFS Work on Mac?
Before you format USB/HDD to NTFS, please be aware that NTFS is a file system primarily used by Windows and macOS doesn’t support writing to NTFS drives by default. You can read NTFS drives on Mac without any issues, but writing to them requires additional third-party NTFS for Mac software.
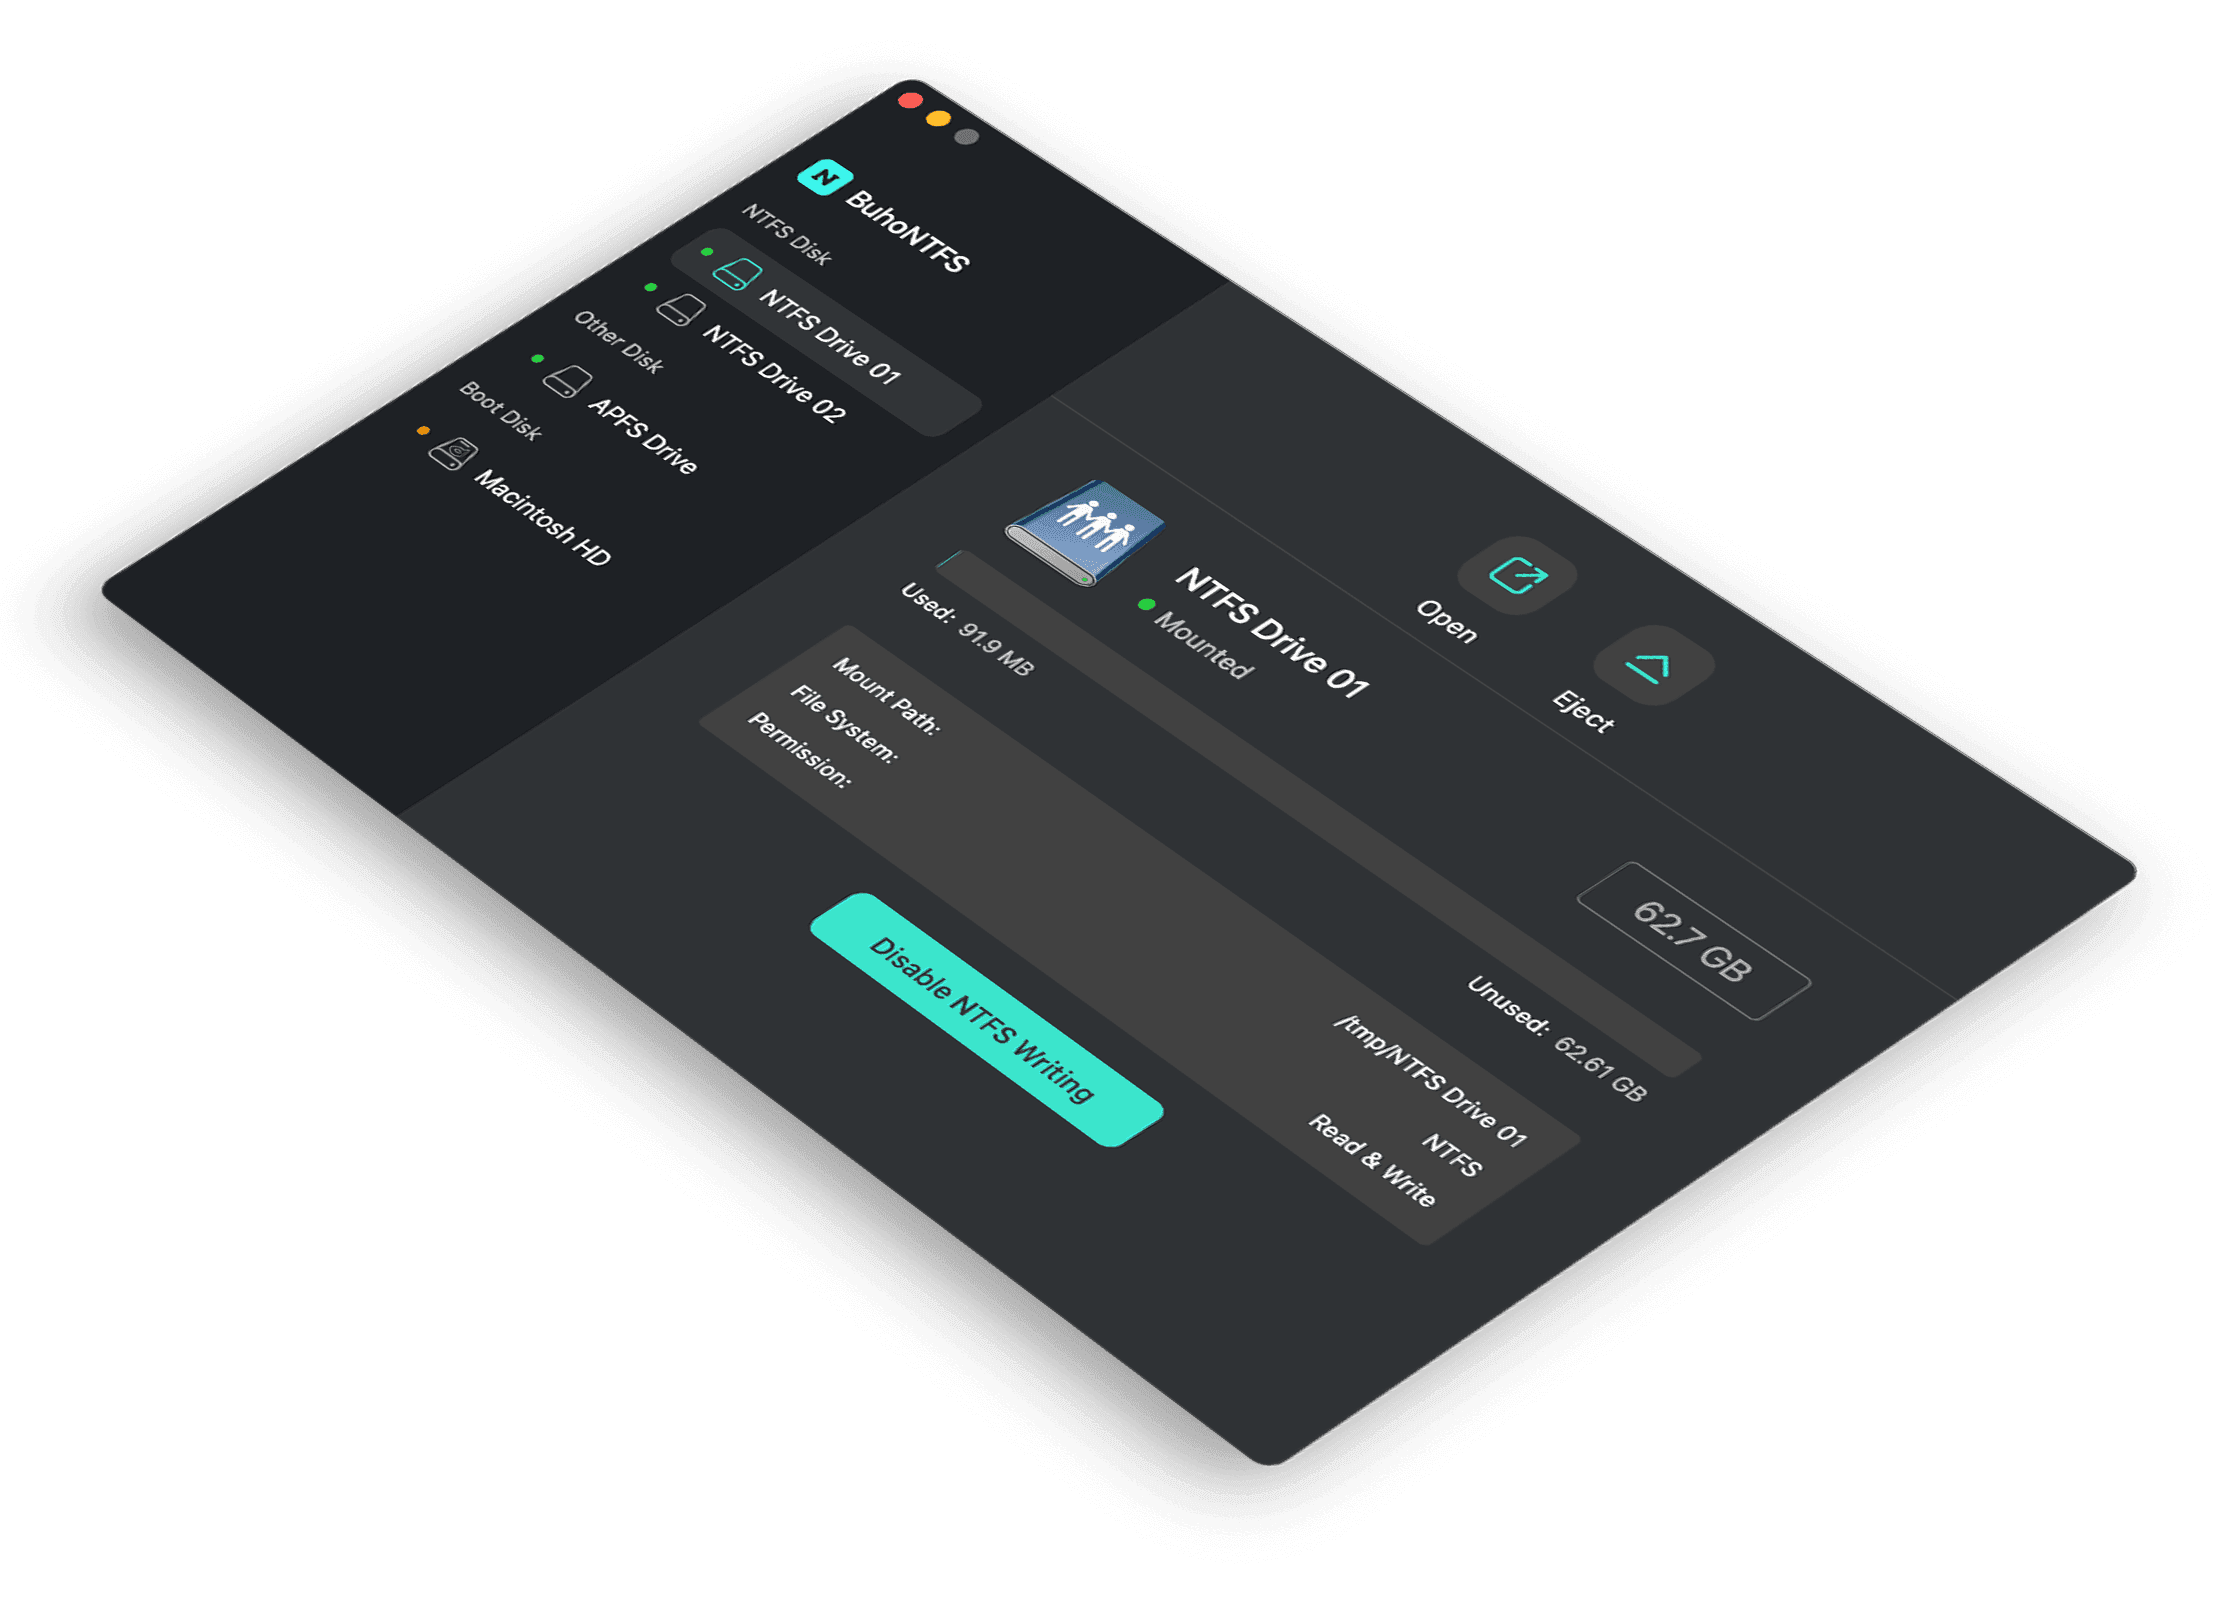
BuhoNTFS is a free NTFS for Mac tool that lets you easily read and write to NTFS drives from your Mac. You can turn on the "Allow Read & Write permission" option to easily change the NTFS disk to read and write status on your Mac.


How to Format USB to NTFS on Windows 10/11
The easiest way to format a USB flash drive to NTFS is to use Windows File Explorer. Check the steps below.
Step 1. Connect the USB drive to your Windows PC.
Step 2. Press Windows + E or double-click This PC to open File Explorer.
Step 3. In File Explorer, right-click the target USB drive under This PC or Devices and Drives. Select the Format option.
Step 4. In the “Format” window, choose NTFS as the file system and optionally type a volume label for the drive.
Step 5. Tick “Quick Format” and click Start to begin formatting the USB drive to NTFS.
These steps also work for formatting an external hard drive to NTFS on Windows 10/11.


Bottom Line
This post mainly introduces how to format a USB or external hard drive to NTFS on both Mac and Windows 10/11 PC. Step-by-step guides are provided.
Cassie has been writing about technology for her entire career life - over 5 years. She enjoys diving into how Apple products work and then breaking it down in a way anyone can understand.