Summary: This post introduces how to downgrade macOS Sonoma to macOS Ventura. You can revert to macOS Ventura by using macOS Recovery, Time Machine, or a bootable installer. Check the detailed guides below.
If you have downloaded and installed macOS Sonoma on your Mac but find that it’s not right for you, you can follow the steps and guides below to downgrade macOS Sonoma to Ventura if you want.
1. Downgrade macOS Sonoma to Ventura with macOS Recovery
Downgrade from macOS Sonoma Official to Ventura
The steps below only work for Intel-based Macs and on the condition that your Mac comes with macOS Ventura.
- Back up data on your Mac.
- Press Power to start your Mac, and immediately press Shift + Option + Command + R to boot into Recovery Mode.
- Select Reinstall macOS to install the macOS that came with your Mac or the closest macOS version that is still available. If your Mac comes with Ventura, then it will install macOS Ventura on your Mac.
The official version of macOS Sonoma was released on September 26, 2023.
Downgrade from macOS Sonoma to Ventura
The steps below allow you to roll back macOS Sonoma to macOS Ventura.
Step 1. Back up data on your Mac.
Before you downgrade to macOS Sonoma, you should make a backup of important data. You can back up your Mac with Time Machine.
Step 2. Get into macOS Recovery.
- On an Intel-based Mac, press the Power button, and immediately press the Command + R keyboard shortcut.
- On an Apple silicon Mac, press and hold the Power button until you see the startup options screen. Click Options and click Continue to start your Mac into Recovery Mode.
Step 3. Uninstall macOS Sonoma.
- After you get into the macOS recovery screen, you can select Disk Utility and click Continue.
- Select your system volume Macintosh HD and click Erase in the toolbar.
- Enter a name for the disk and click Erase to wipe your Mac and uninstall macOS Sonoma from your Mac.

Step 4. Install macOS 13 Ventura on your Mac.
- After wiping your Mac, your computer will restart, and the Recovery Assistant will launch.
- Select a Wi-Fi network to connect and activate your Mac.
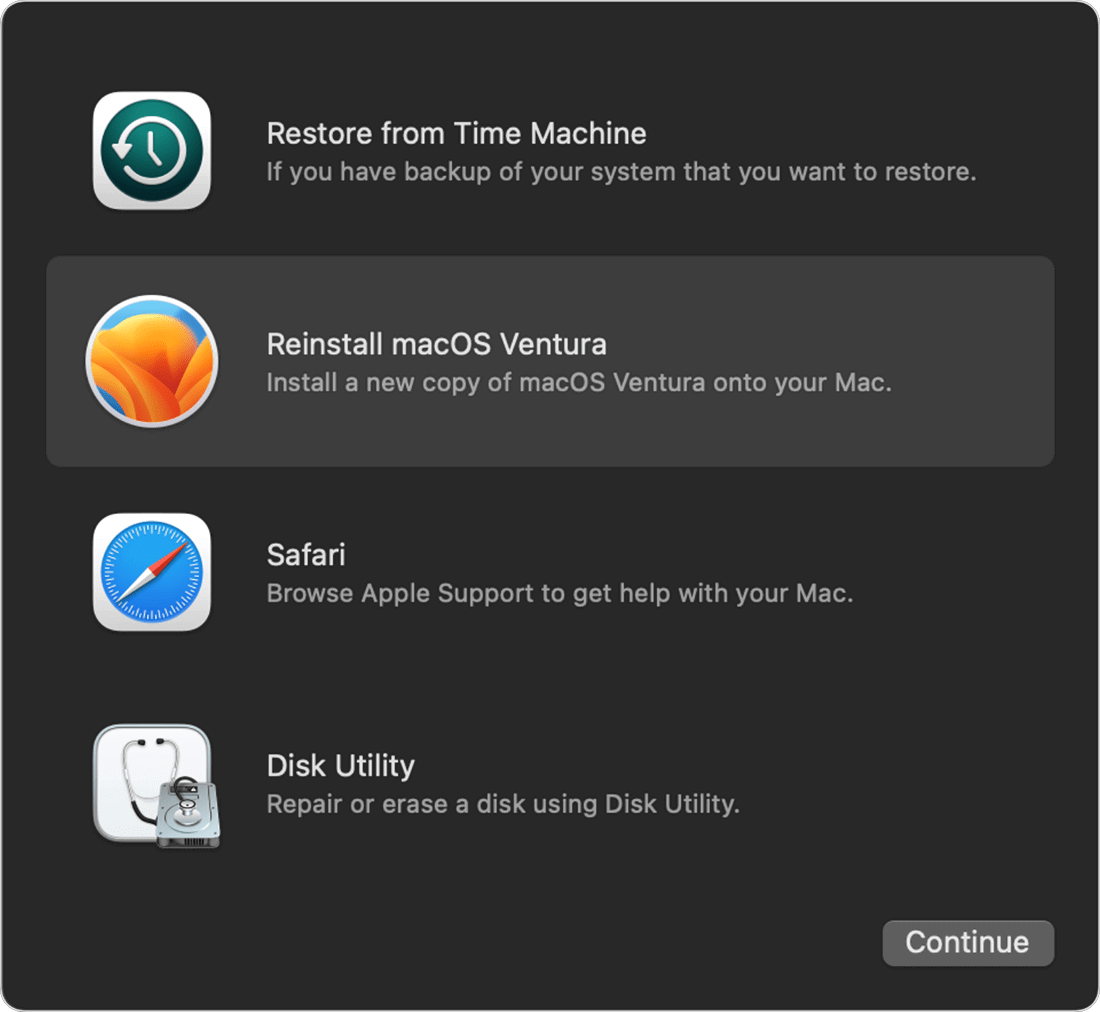
- Click Exit to Recovery to go to the macOS Recovery window again.
- Select Reinstall macOS Ventura and click Continue to follow the instructions to revert to macOS Ventura and set up your Mac.
2. Downgrade macOS Sonoma to Ventura with Time Machine
If you have made a backup of macOS Ventura with Mac Time Machine before upgrading to Sonoma, you can follow the steps below to revert macOS Sonoma to Ventura.
Step 1. Connect the Time Machine backup drive to your Mac.
Step 2. Restart your computer and press Command + R to enter Recovery Mode. For Apple silicon Macs, press and hold the Power button.
Step 3. Select Restore from Time Machine Backup and click Continue.
Step 4. Select the disk that contains the Time Machine backup and select the target macOS Ventura backup. Follow the prompts to downgrade from macOS Sonoma to macOS Ventura.
3. Downgrade Sonoma to Ventura with a Bootable Installer
To go back to macOS Ventura from Sonoma, you can also perform a clean install of macOS Ventura on your Mac.
Step 1. Open the Mac App Store. Search for macOS Ventura to download its installer file to your Mac.
Step 2. Connect a blank USB (16 GB or above) to your Mac.
Step 3. Click Spotlight and search for Disk Utility to open it. Select the target USB in the sidebar and click the Erase button. Choose Mac OS Extended (Journaled) as the format and select GUID Partition Map as the scheme. Click Erase to format the USB.
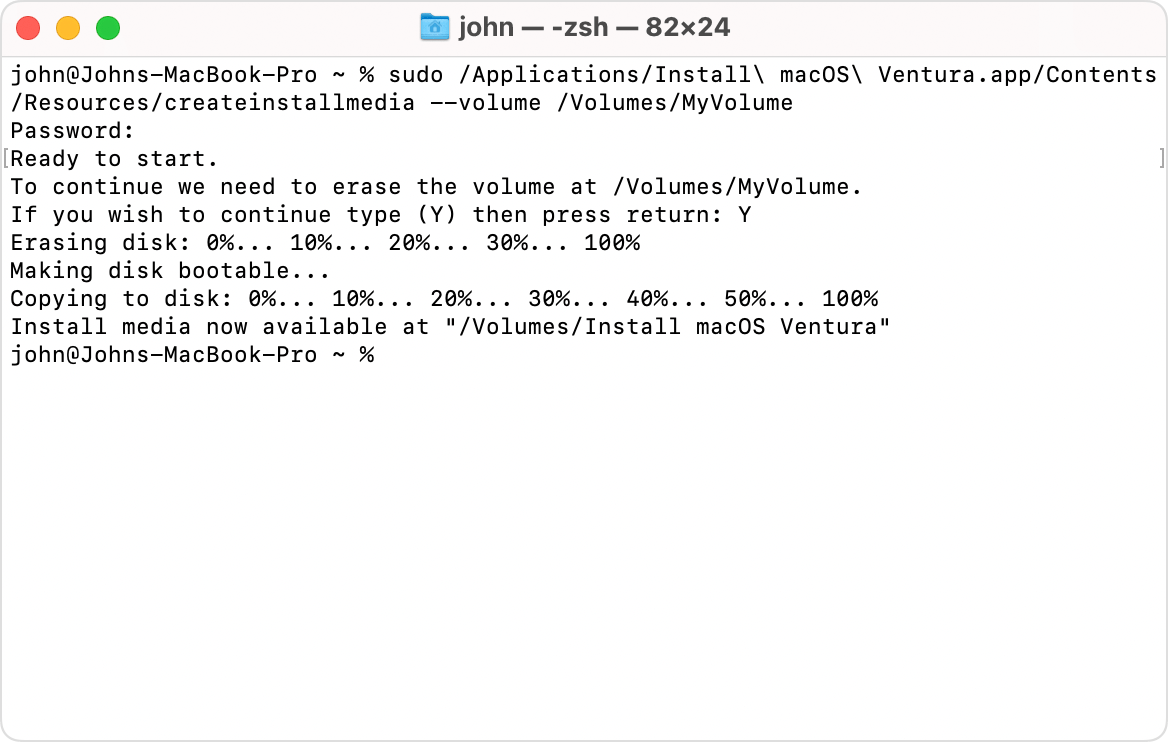
Step 4. Click Spotlight and search for the Terminal app to open it. Type the command sudo /Applications/Install\ macOS\ Ventura.app/Contents/Resources/createinstallmedia –volume /Volumes/MyVolume. Replace “MyVolume” with the exact name of the USB drive and press Enter to create a bootable installer for macOS Ventura.
Step 5. Connect the macOS Ventura bootable USB to your Mac. Start your Mac and press the Option key as your computer starts. For Apple Silicon Macs, press and hold the Power button. Select the bootable USB as the startup disk and follow the instructions to downgrade from Sonoma to Ventura.
Conclusion
This post introduces 3 ways with detailed guides to help you downgrade macOS Sonoma to Ventura. You can choose a suitable way based on your preference.
If you need a Mac cleaner program to clean your Mac and boost its speed, you can try BuhoCleaner. This program offers various Mac cleaning features. You can use it to remove junk data, uninstall apps, delete large files, free up RAM, manage startup items, and more.